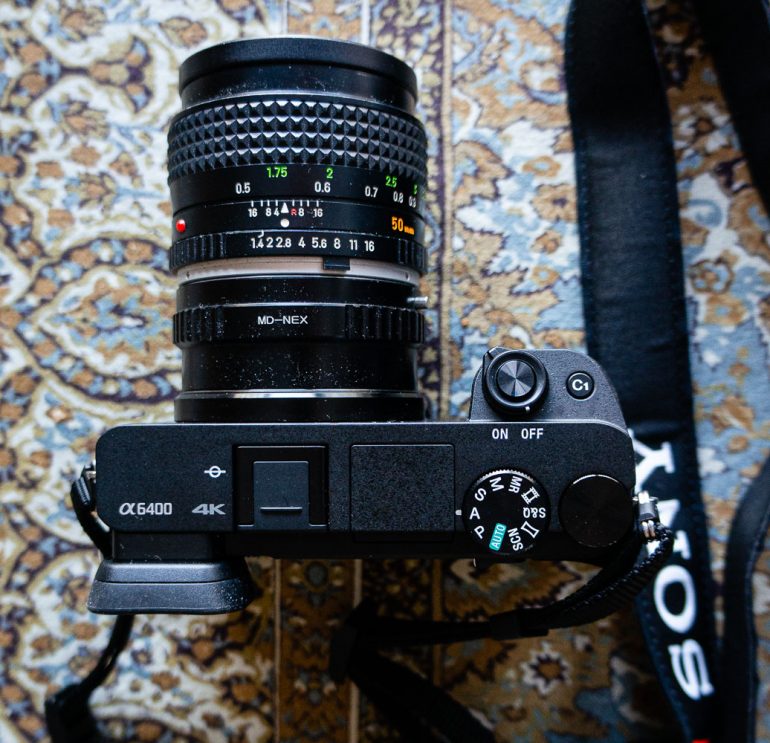
In this quick article I wanted to show you all how versatile the Sony A6400 Mirrorless Camera can be by utilizing lens adapters. In this case I was using a super cheap passive MC/MD Minolta to Sony E-Mount mount lens adapter I got an Amazon Here >>
The Minolta MC 50mm f/1.4 Rokkor-X Lens is the lens I used and I simple mounted it to the lens adapter and Sony A6400. For the money this old school lens is one of the best I have ever used. You can pick them up for around $50 US if you shop around.
The Minolta MC 50mm f/1.4 Rokkor-X Lens is fully manual, so you have to actual turn the focus ring and aperture ring to get the desired results. In my case I was shooting wide open at f/1.4 for all these images, and that is pretty much always how I shoot with this lens. I love the super narrow depth of field and bokeh render it produces as you will see in these sample photos below.
For the modern autofocus equivalent to this lens, be sure to check out My Sony FE 50mm f/1.4 Zeiss Lens vs the FE 50mm f/1.8 Lens Review Here >> Also, for a much more affordable APS-C lens option, you can check out My Sony E 50mm f/1.8 Lens Review Here >>
Now the Sony A6400, and all the recent Sony cameras for that matter, offer built in tools to help you focus manual lenses. One tool is the focus peaking feature which I recommend enabling. This will give you a visual indication that you have achieved key contrast which means sharpness is being attained as far as what the camera is seeing. It’s a great feature and I almost always use it with this lens. In addition to that you have the focus magnify tool which will give you a 100% view of what that sensor sees, so you can insure the sharpness is exactly where you want it. I always use that feature to insure I have the eyes sharp.
The last setting I use to help increase my chances of sharp shots, is the multi-shot drive mode so the camera takes multiple frames at a time if you hold the shutter button down. One of them is bound to be in focus if you do that. If you take just one image at a time in single shot drive mode, it’s really hard to get a sharp shot, because of the narrow depth of field, your subject if a kid always moves a little bit, and you also move a little bit if hand holding.
Working with such narrow depths of field is challenging, so using the built in tools and taking multiple frames in rapid fire mode, really helps make increase your chances of getting a keeper frame. With some practice you can really become proficient at getting sharp shots almost every time.
Be sure to click on the images you like for a nice large view in a gallery format that is really nice!


Closing Remarks
Well, that is about it for this quick sample photo/ A6400 camera and lens testing article. Please let me know what you think Aviator Uçak Oyunu Oyna below in the comments area and be sure to ask questions if you have them. Have a great day and I will catch up with you all later! Jay


