So you just got the Sony RX100 VII and plan on using it for vlogging, but you are not sure what you need in order to accomplish this task? Well then this is the article for you!!
So what is Vlogging exactly? Well, it’s a broad term that in my mind basically means filming in front of the camera for one purpose or another. Reviewing a product, telling a story, and traveling are a few things that come to mind…
If filming in front of the camera is your intention, then you really need to consider several things before diving in head first.
For example:
- How are you going to hold the camera? Use a tripod, grip, hand hold it, or use a rig of some sort?
- How are you going to power the camera? Just use the in camera batteries or use a power bank?
- Do you plan on walking and talking with the camera? If so, Stabilizer options?
- What kind of microphone should you use and how to attach it to the camera?
- How do I set-up the microphone for the best sound?
- What camera settings are best for recording video?
- Memory card options?
- Post production options for editing video and uploading to youtube?
With all the options out there for various solutions, specs to go over, and price points to consider, it can be near impossible to know what to get. Not only that, but frustrating, because when you do decide to get something, you might have doubts on the decisions you made.
Believe me, I understand and in this article I will try my best to break down all the various options available today to help you get going with your vlogging endeavor.
Sony RX100 VII Vlogging Set-up Options
The most important tip I can offer you about vlogging with the Sony R100 VII in my opinion is having good audio. Quality audio is really what separates an ok video to a professional sounding video. Remember, the footage you are going to get from the RX100 VII is fantastic, so you don’t need to worry about that. The audio on the other hand is not the greatest when compared to using an external mic. More details and options on that below.
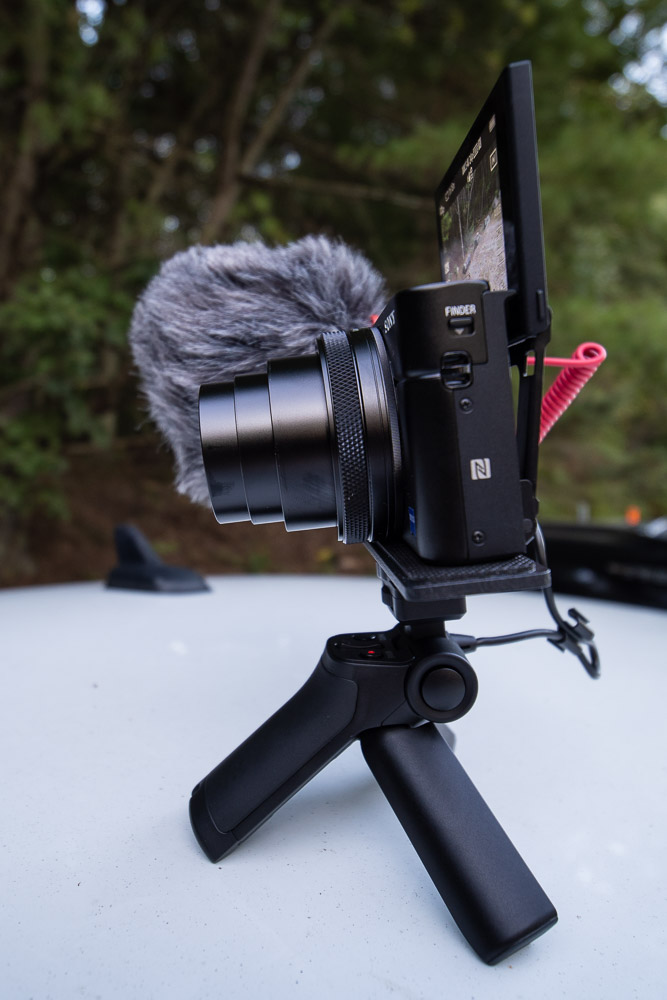
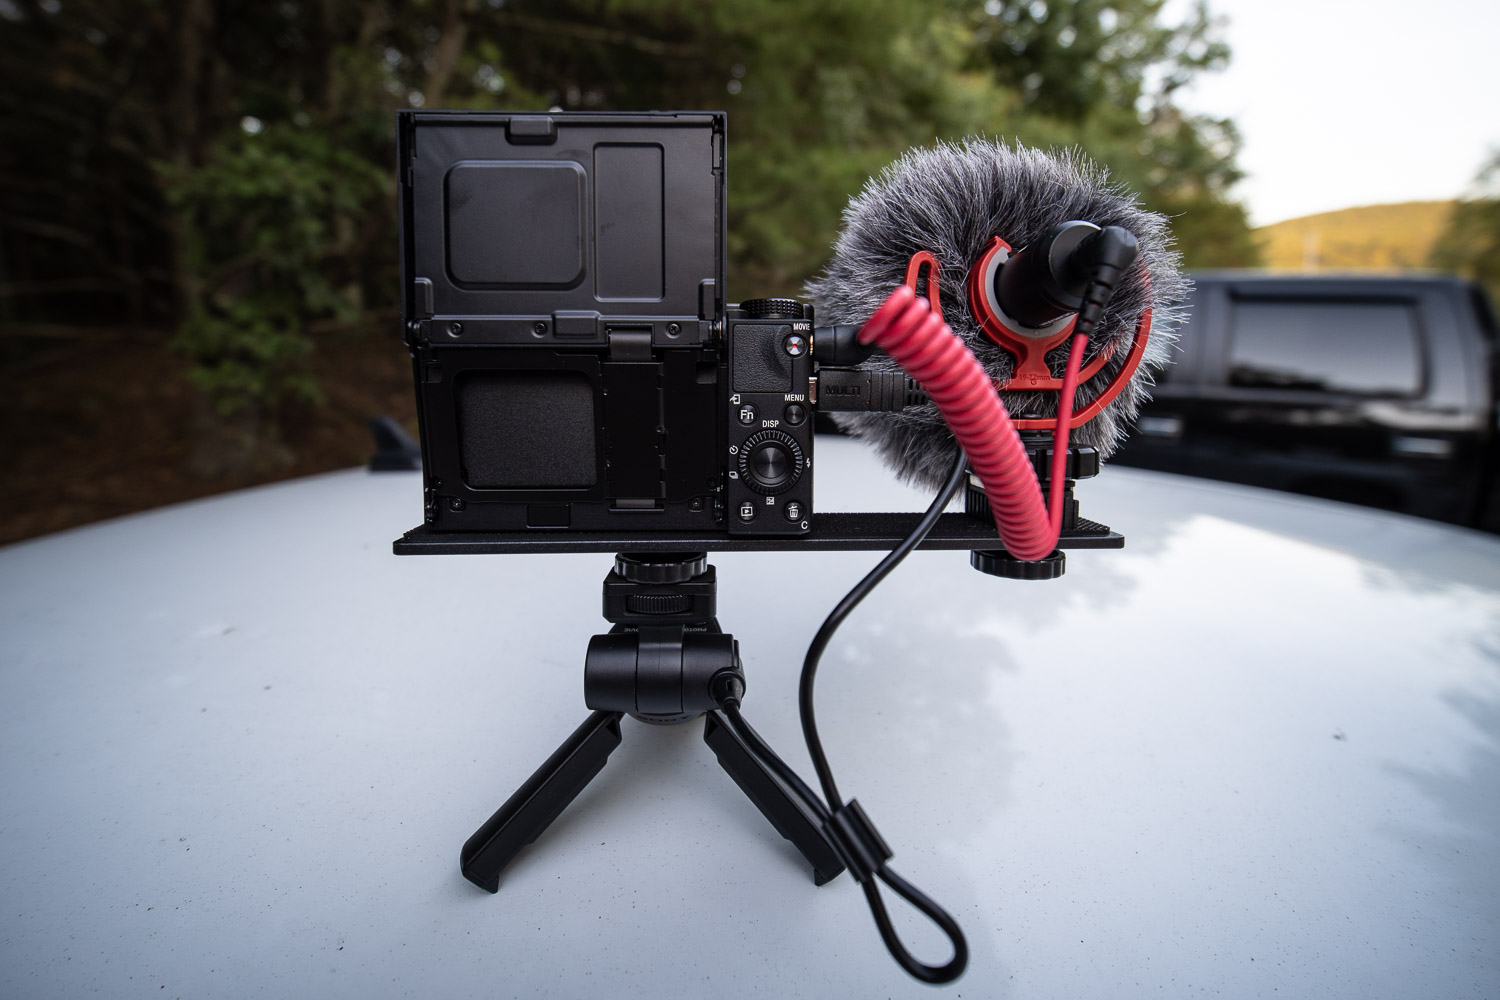
The one issue you need to overcome with the Sony RX100 VII is the lack of built in hot shoe that makes it very convenient to mount a hot shoe style mic. Even if there was a built in hot-shoe on the RX100 VII, the mic would then block the flip up screen causing another issue. Therefore you need some kind of bracket to push the microphone out to the side of the camera. This issues creates the need for some kind of rig….
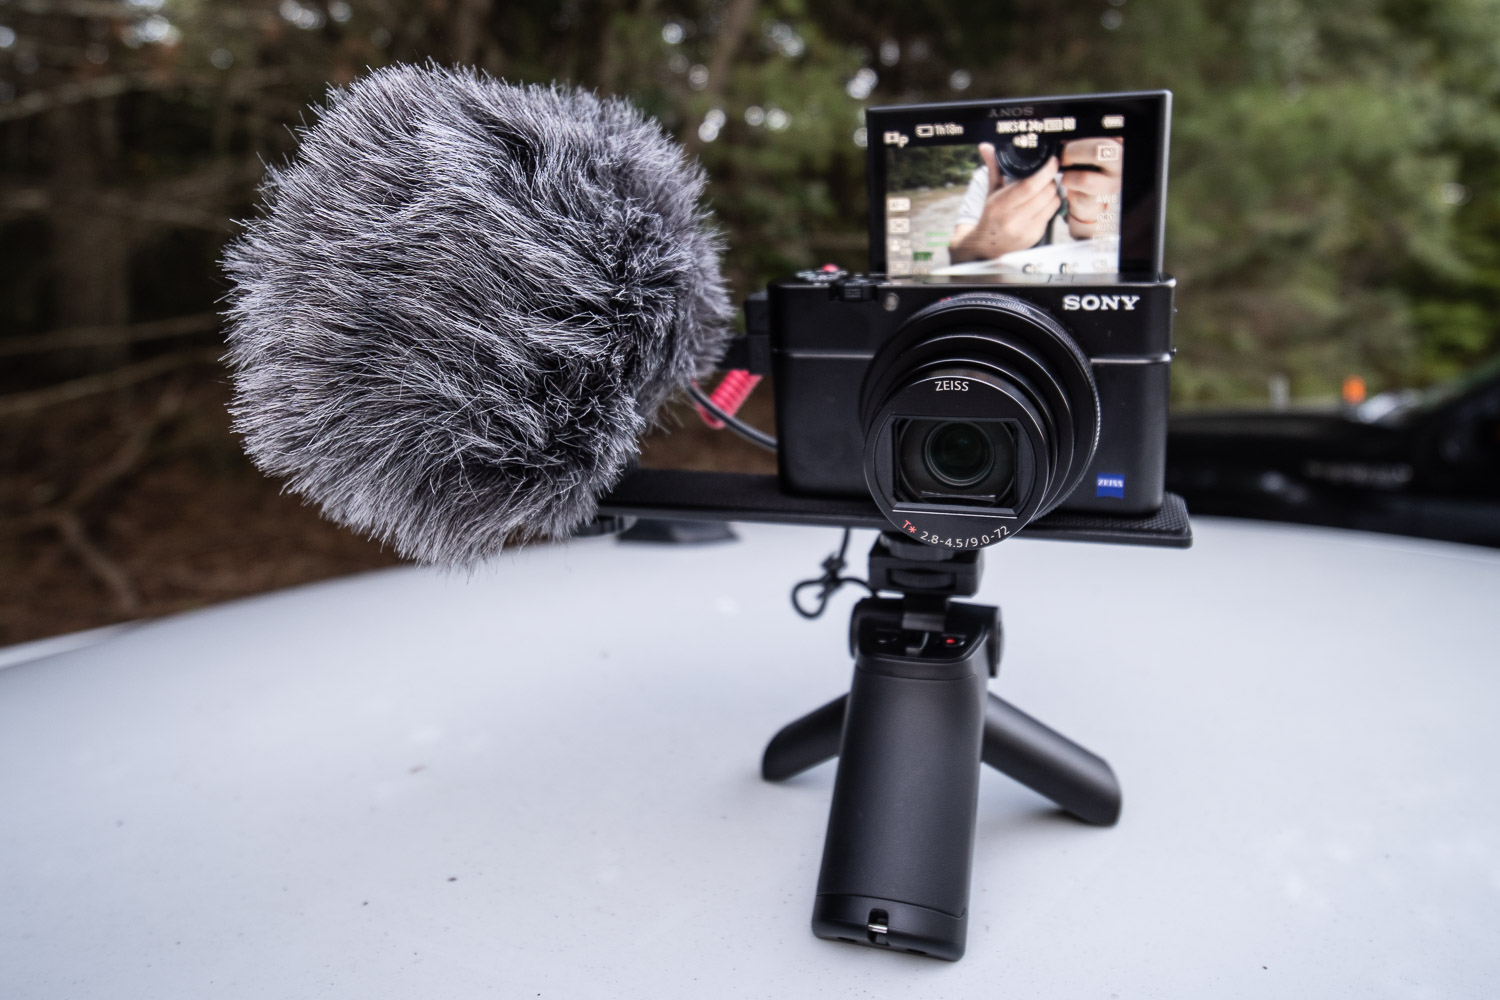
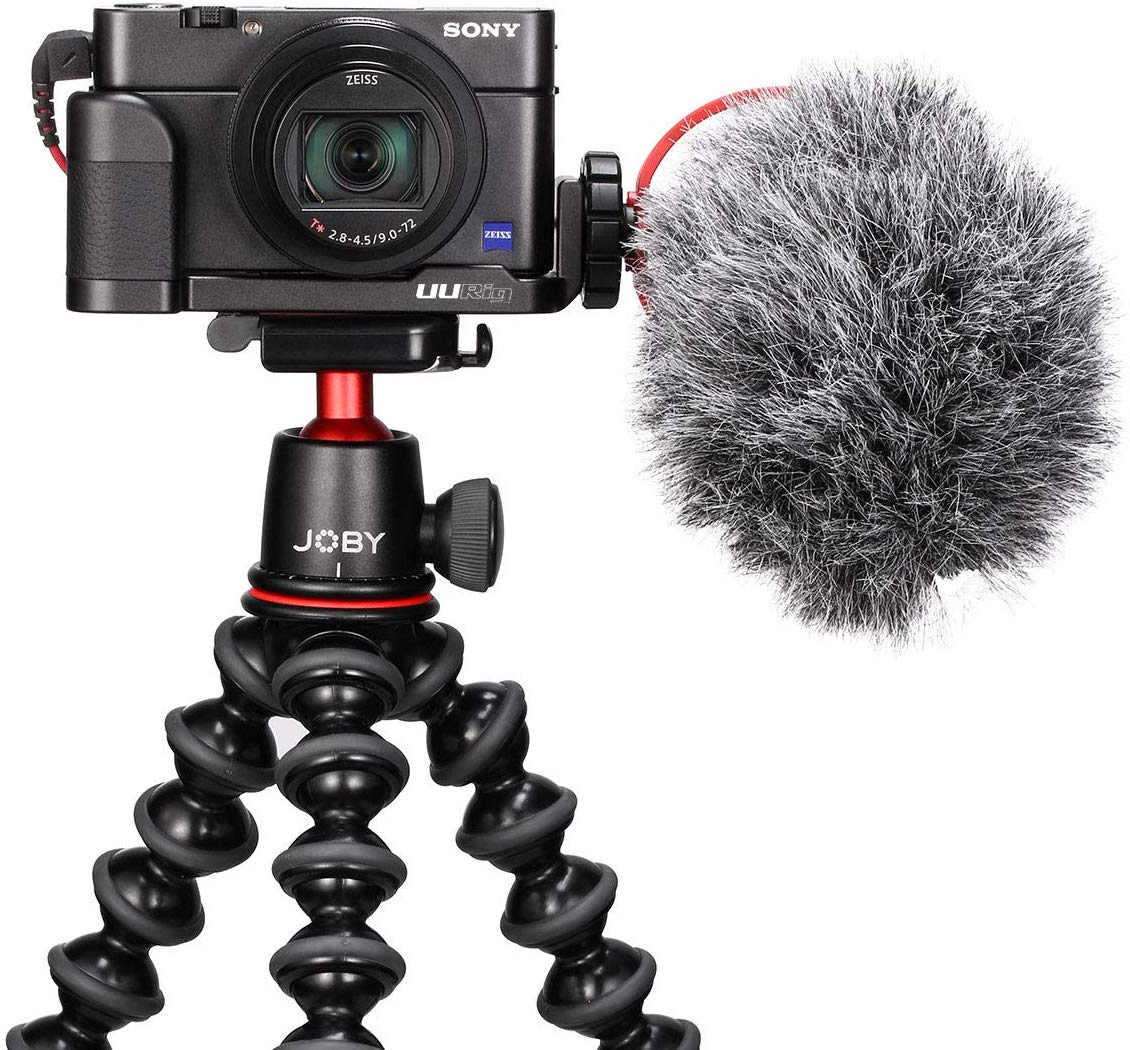
Here is the set-up I used for testing out the Sony RX100 VII for Vlogging in my recent review campaign. My Sony RX100 VII Review is Here >>
This set-up worked really well overall I would say and the extra gear besides the camera itself was very affordable! I did learn a few things however, and I will share that in a second.
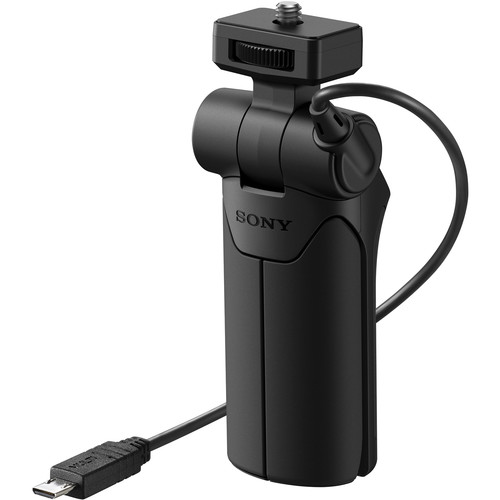
- Sony VCT-SGR1 Shooting Grip $98 US @ BHPhoto | Amazon
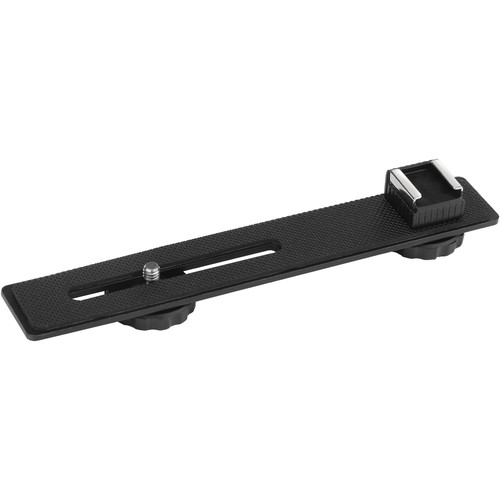
- Vello Hot Shoe Bracket $9.95 US @ BHPhoto | Amazon
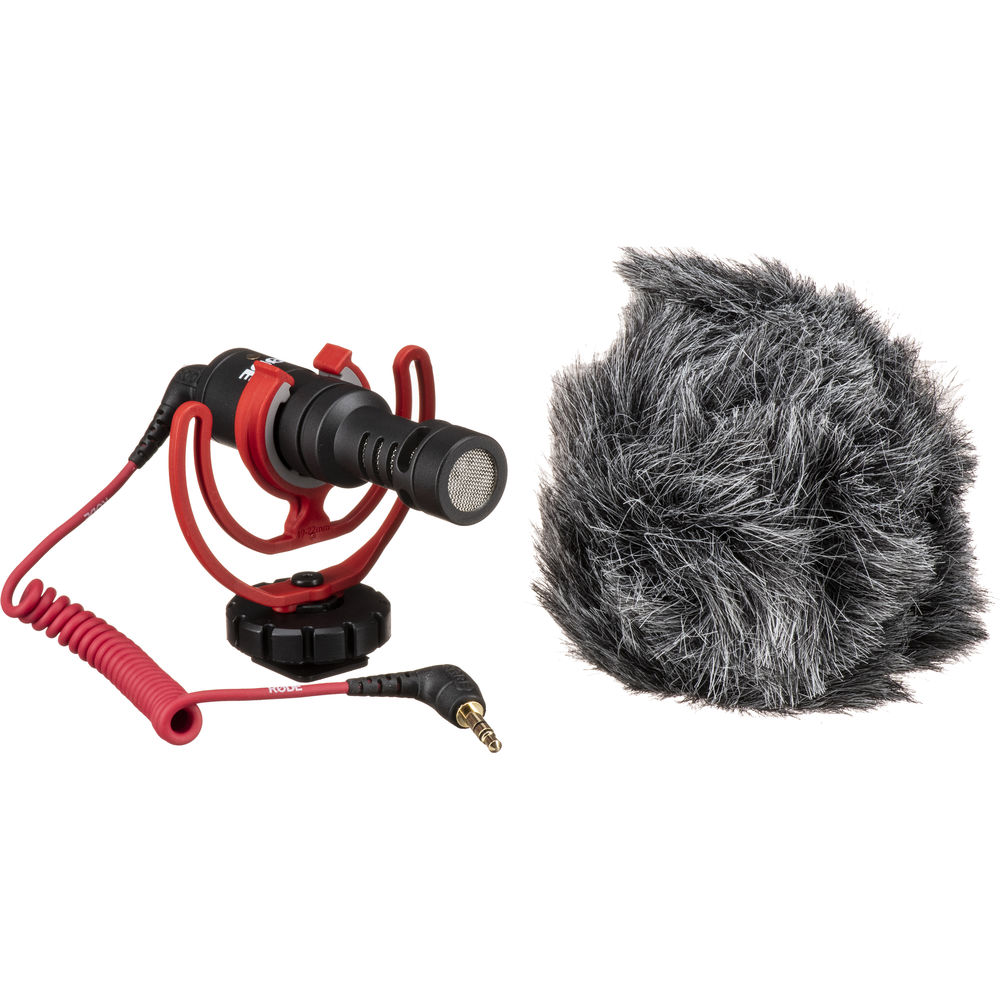
- Rode Microphone $59 US @ BHPhoto | Amazon
- SDXC Memory Card for 4K from $39.99 US @ BHPhoto | Amazon
More on the Sony RX100 VII vlogging set-up I used and actual testing Here >>
Better Mic Holder Options to Consider
Now the set-up above is just one solution for a vlogging when using the Sony RX100 VII and is really for the budget oriented user as far as extras go, because clearly the camera is not cheap!
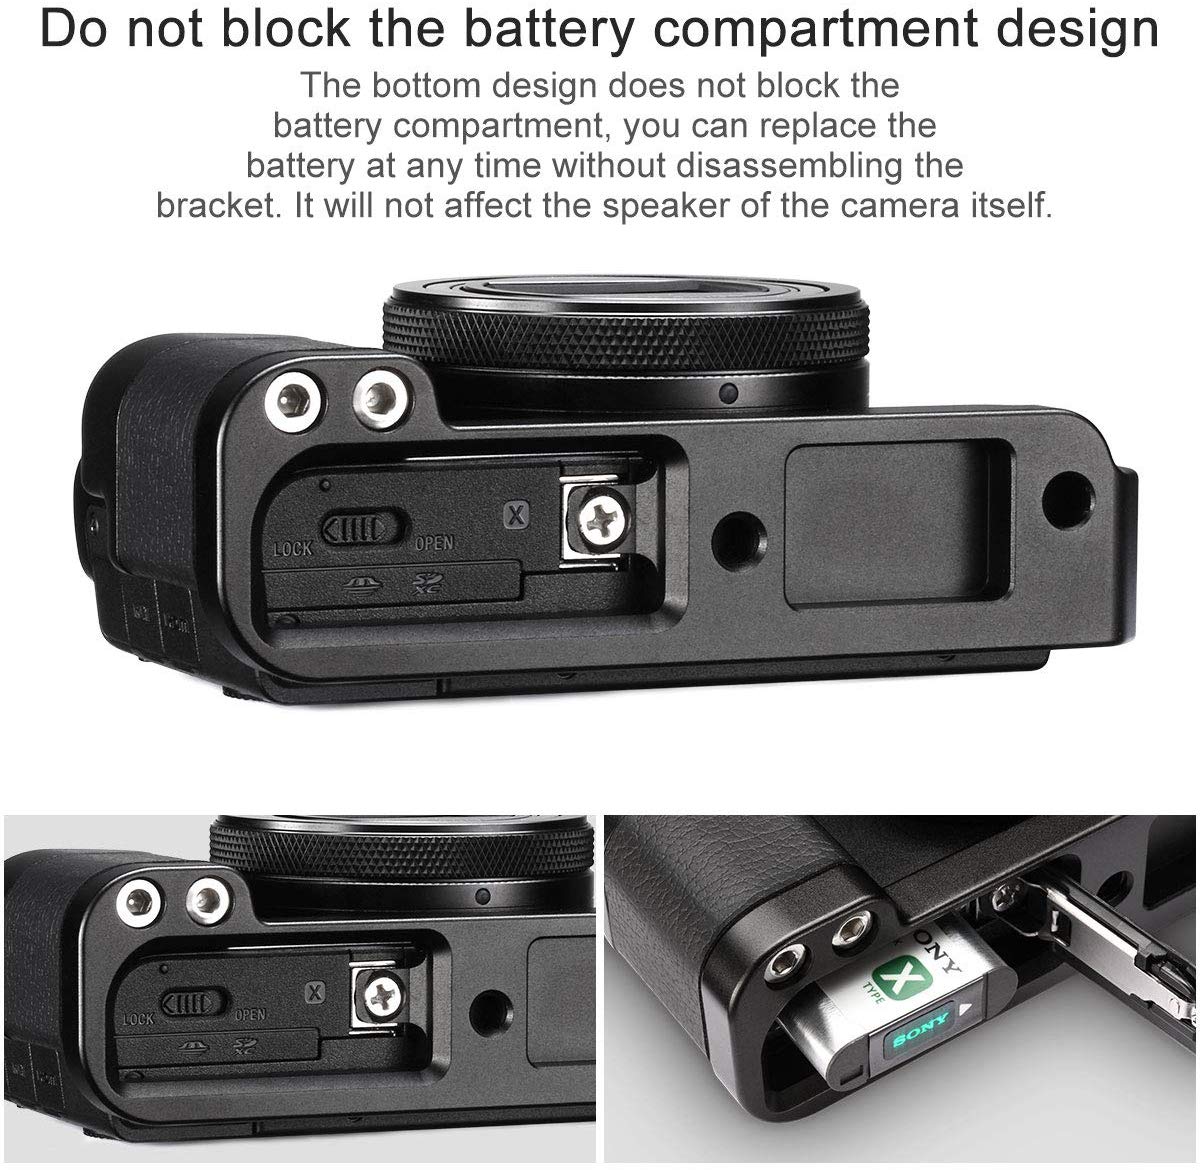
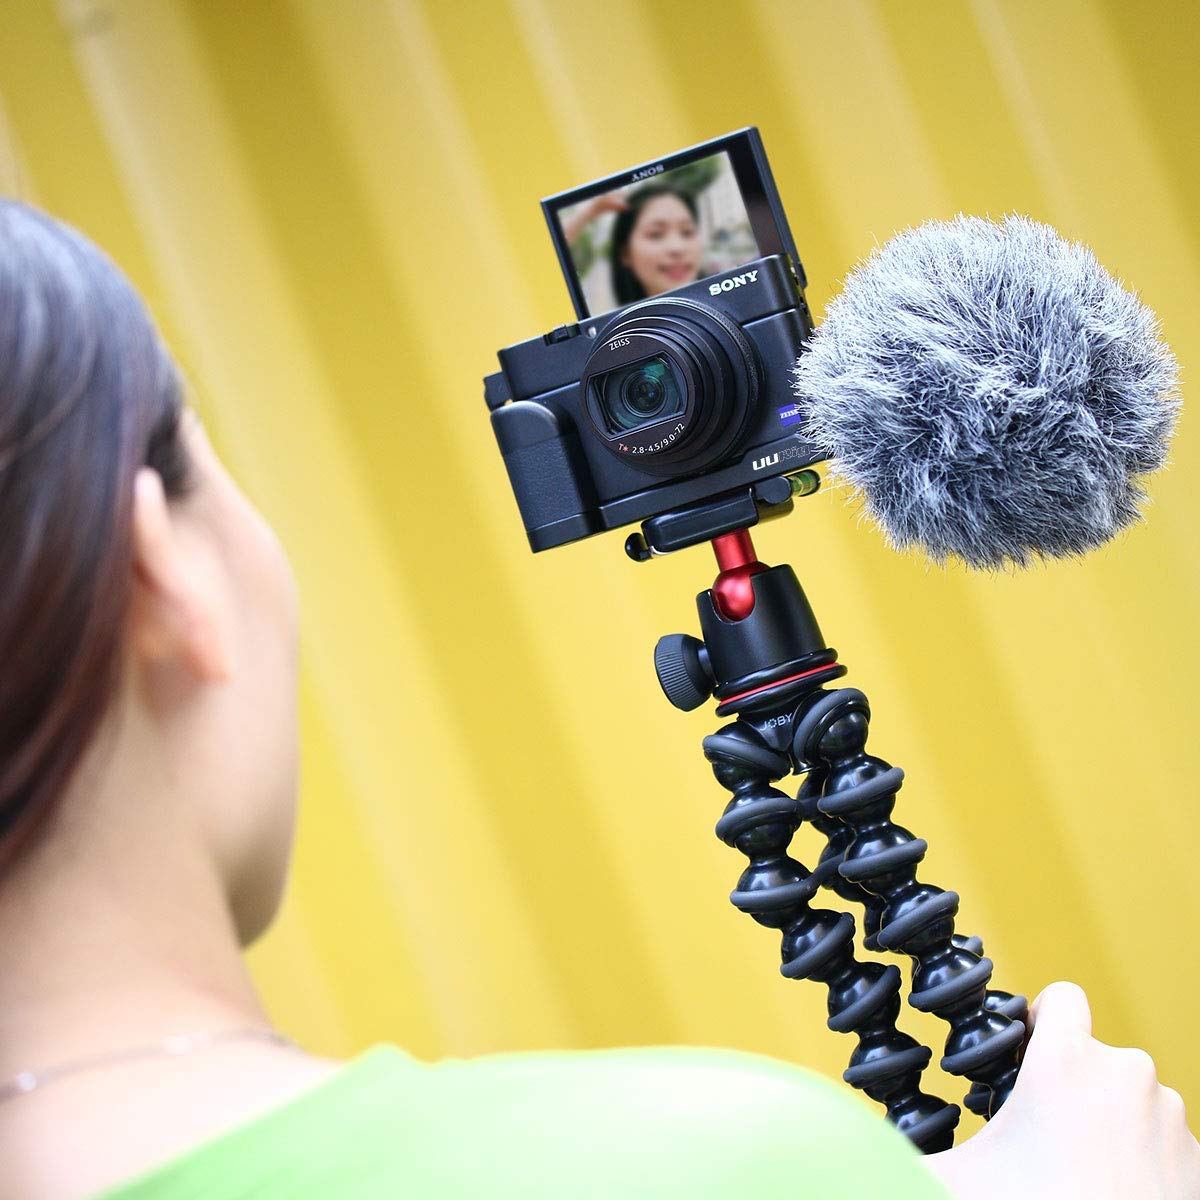
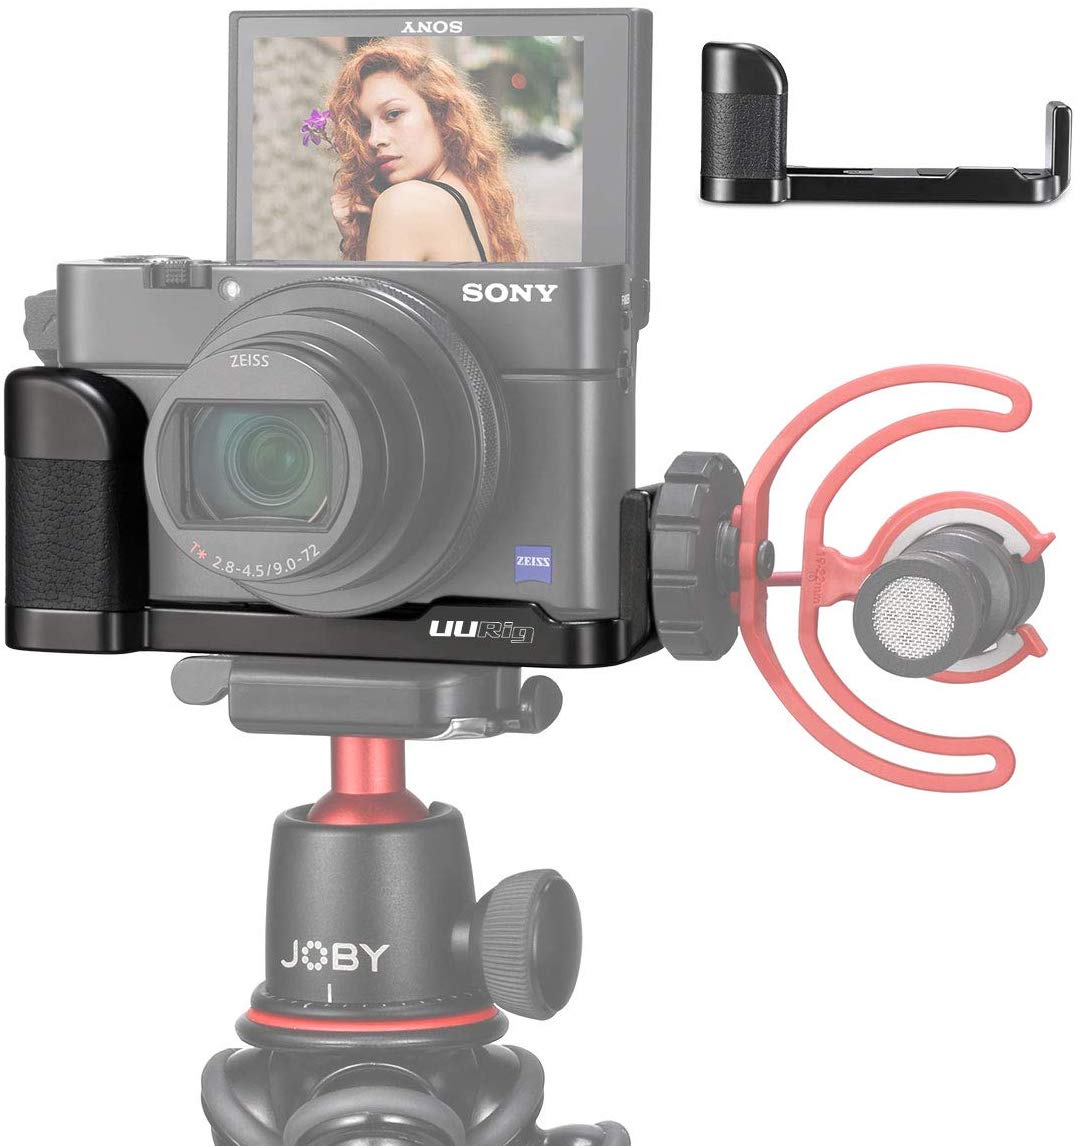
Now, another flash mounting option for the RX100 VII I found that is very affordable $24.95 US on Amazon (Click Here) and offers a beefy grip plus access to the battery and memory card which you can see below.
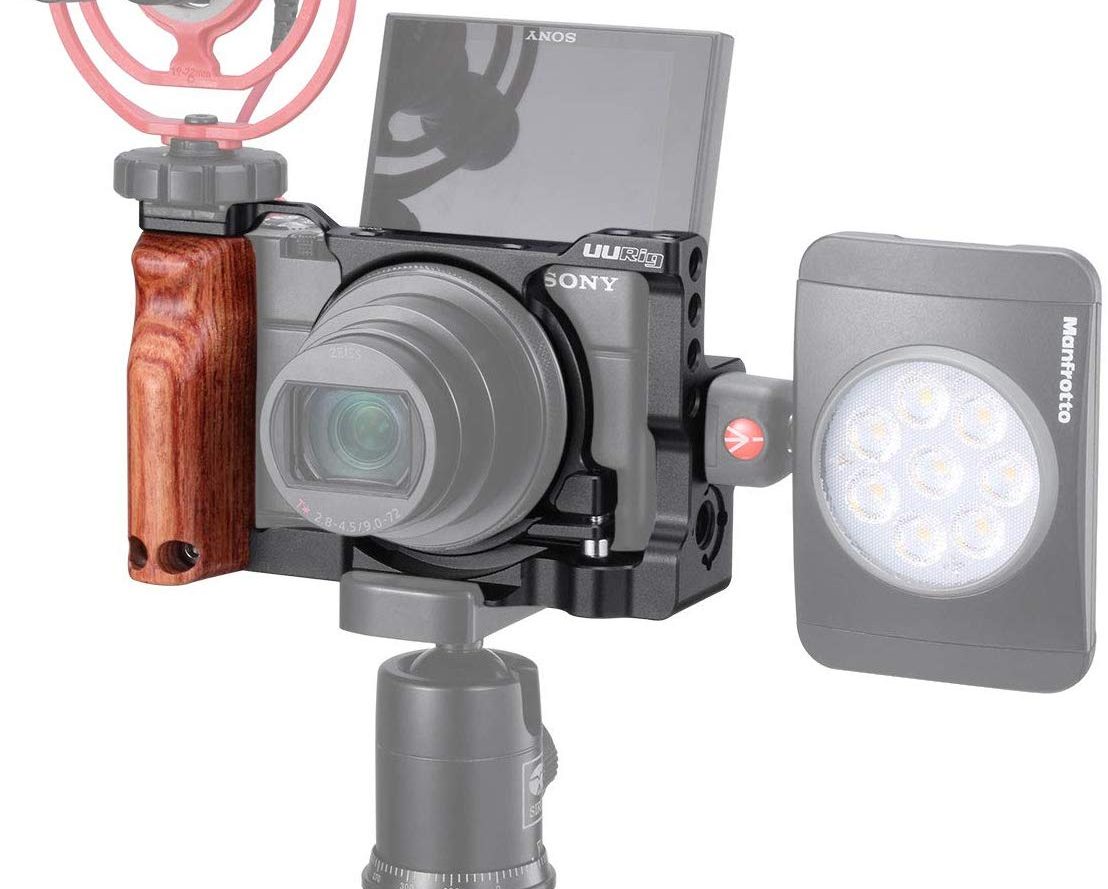
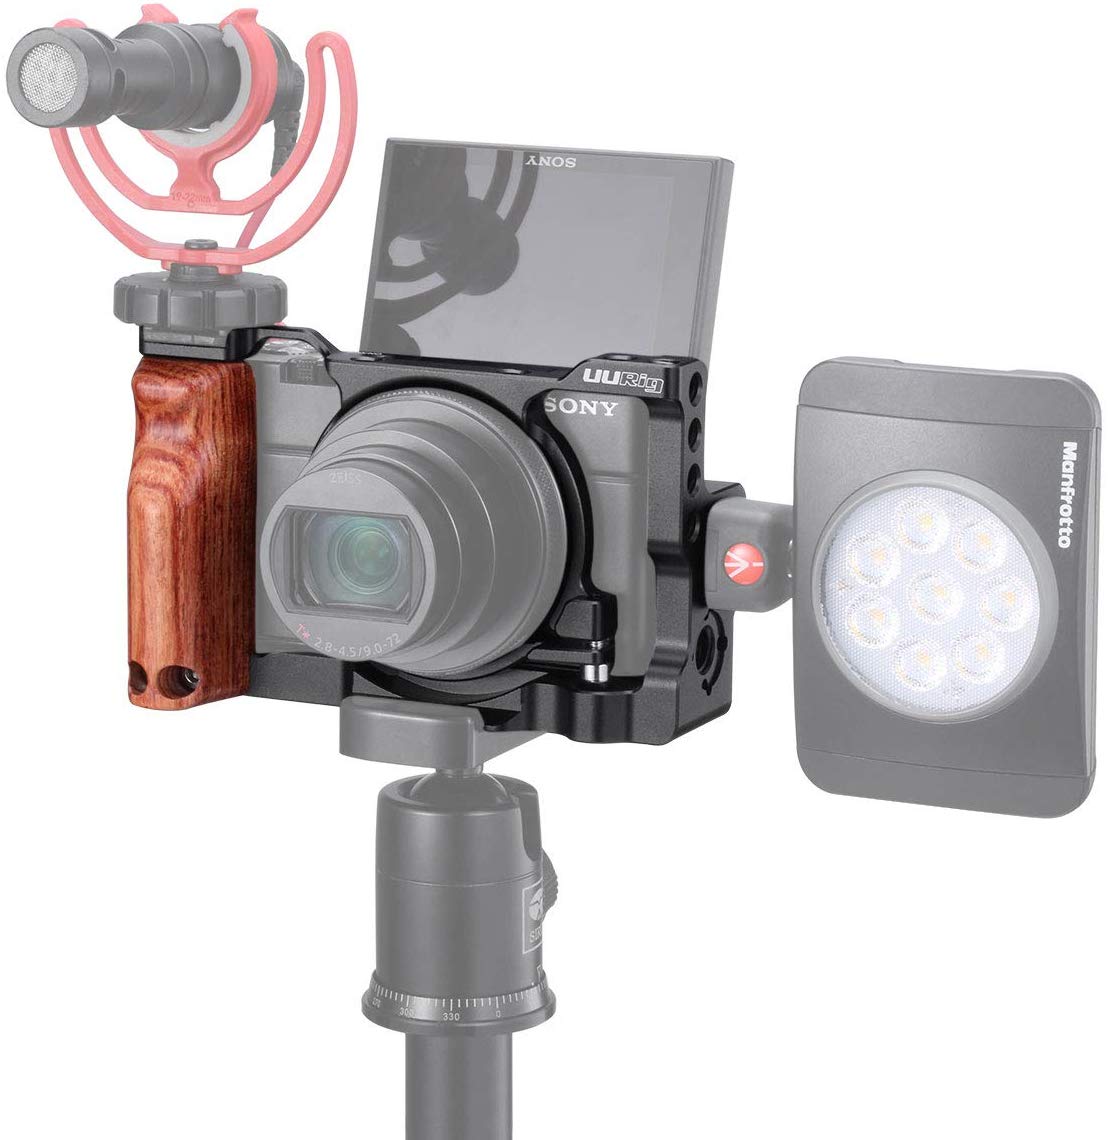
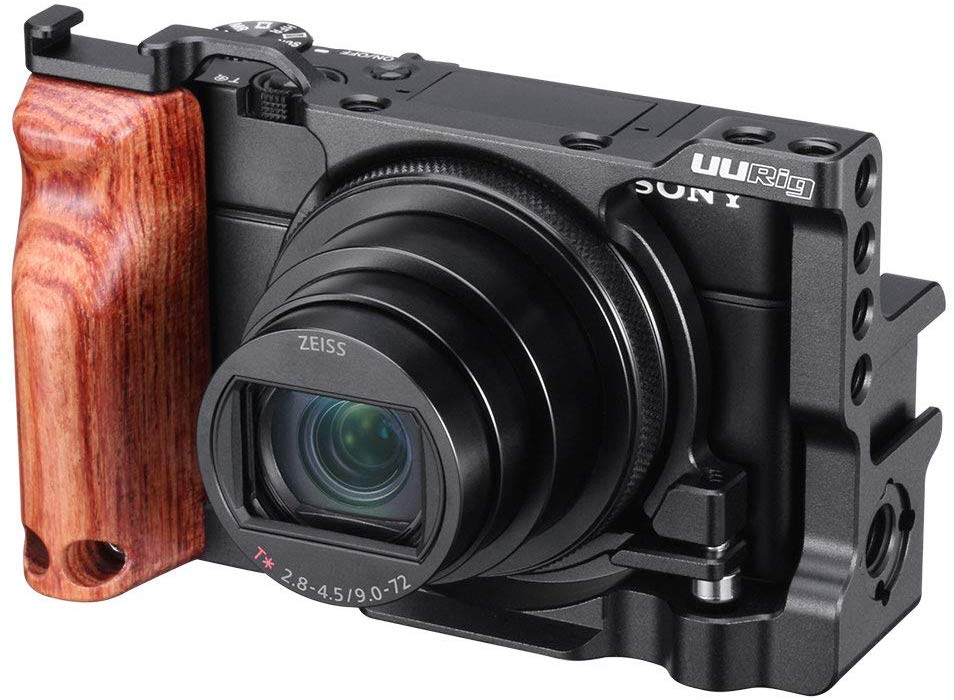
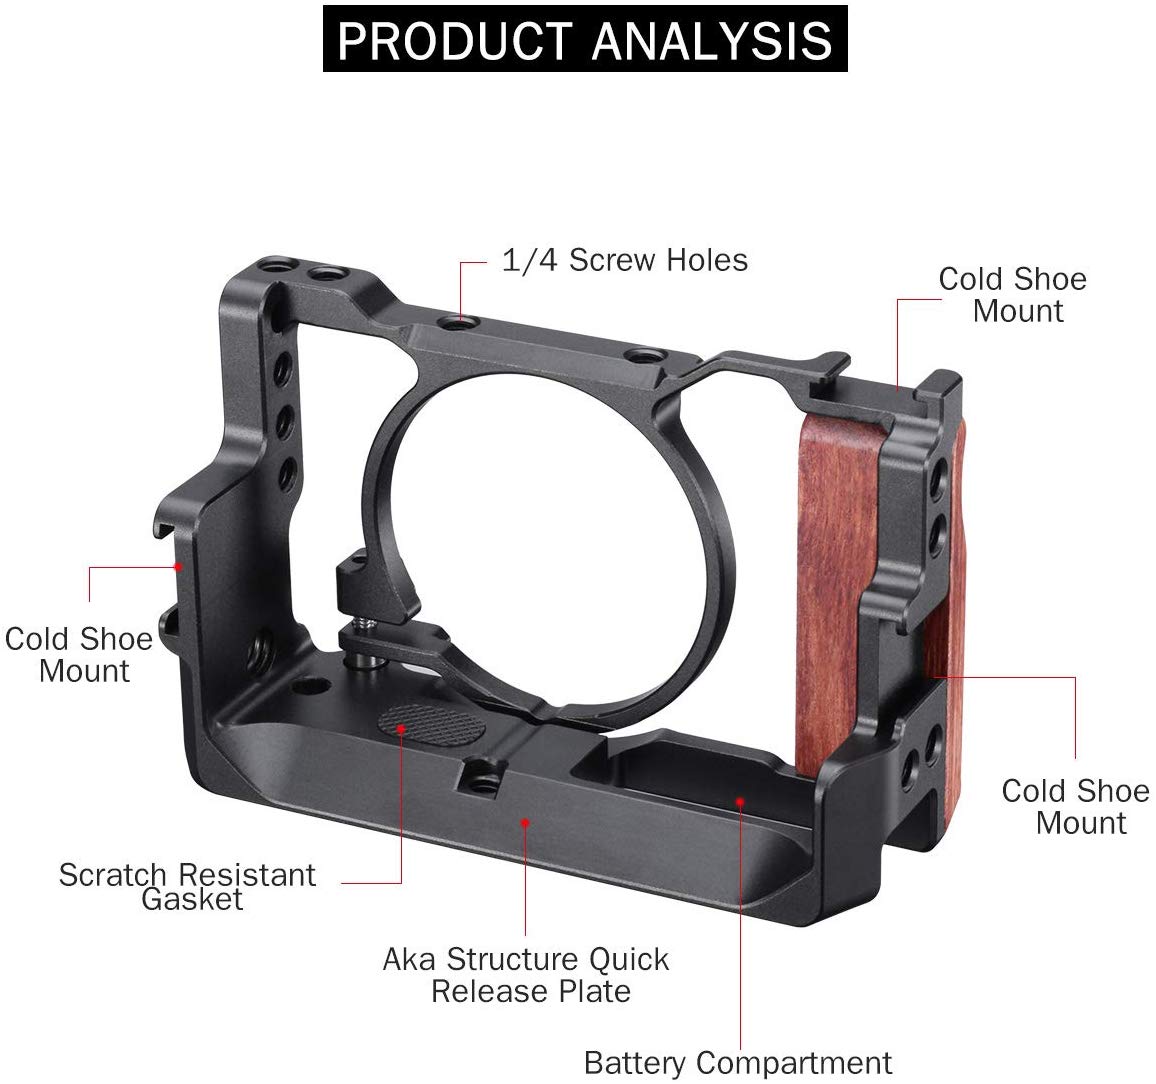
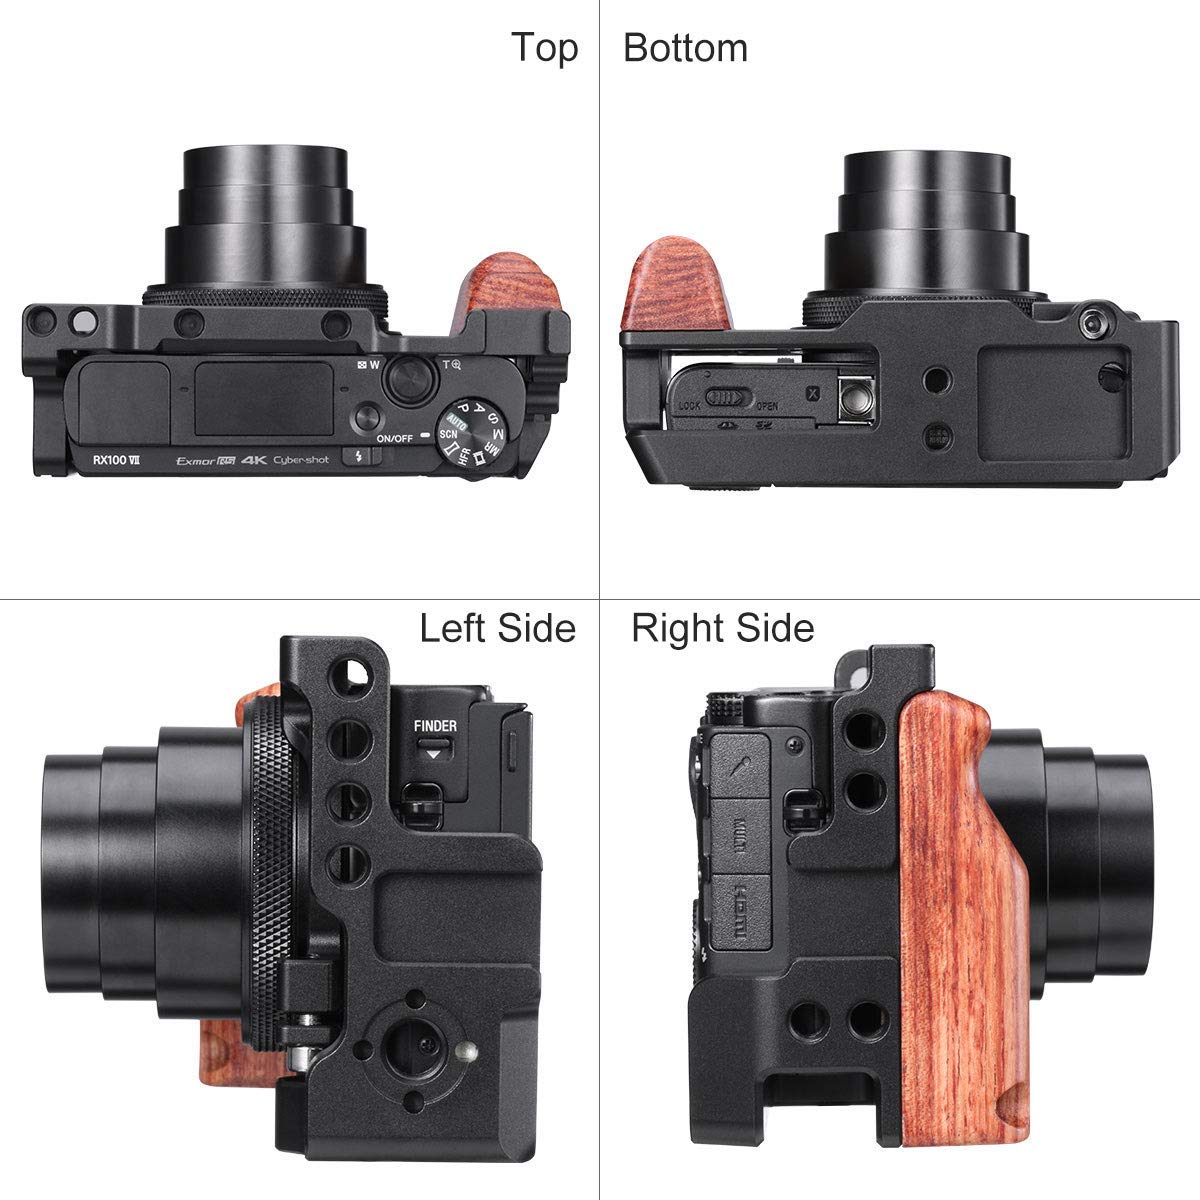
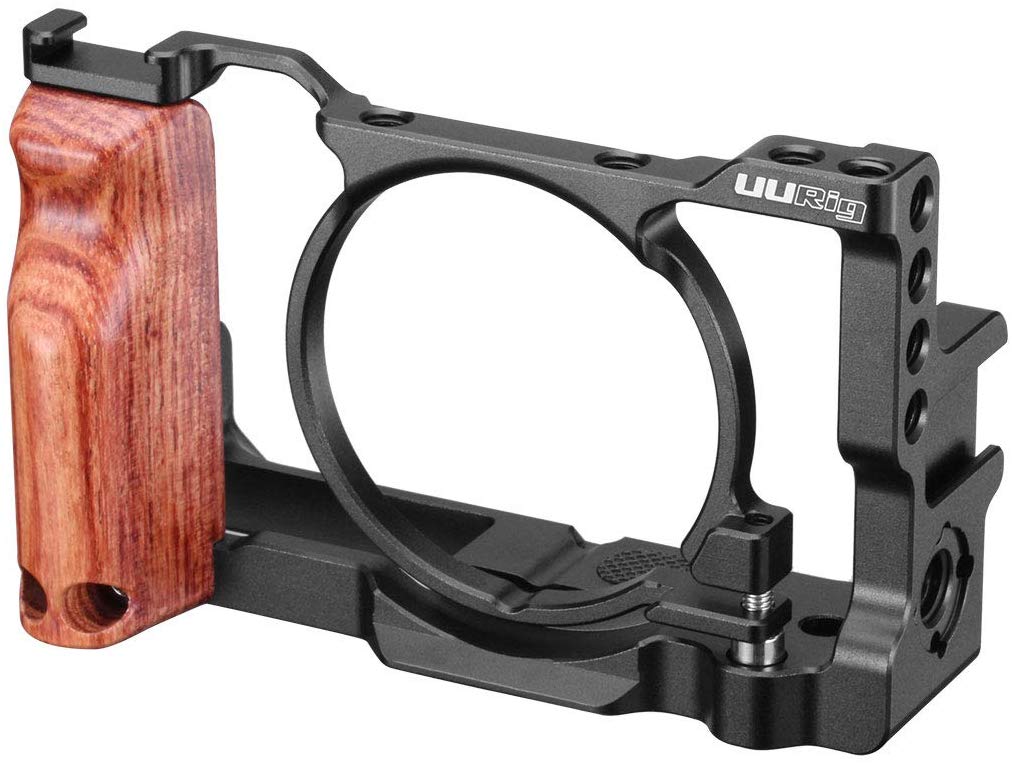
RX100 VI, and VII Vlog Cage with Wooden Handle
Here is another very affordable Cage Rig solution for the RX100 VI and VII that looks fantastic and offers two mount points which is great for a mic and video light solution. The full cage offers way more flexible compared to the option above and it goes for $39.95 @ Amazon (Click Here)
If had to get a rig today for the Sony RX100 VII it would be this one, because I am on a budget and this looks perfect for a variety of situations. You can hand hold this rig, or mount it to a tripod, a grip, or even a stabilization gimbal which I will cover in more detail below.
Microphone Options and Set-up Tips
Using an external microphone is key to getting good audio quality and is very important if you want your vlogging material to be presentable professionally in my opinion. The on camera mic will work, but it really sucks compared to an external mic, which is why the mic input was so desirable to those wanting to use the RX100 series cameras for vlogging purposes.
When using the external Mic is it very important to check your audio record levels on the camera, and you can do this easily when in movie mode. They show up as green audio bars and can be adjusted in the menu in camera settings 2 – Audio Record Levels. Make sure you are not going into the red when talking into the mic. I ended up having mine around 9 or 10 just so you know for reference. It was way to high by default and this must be adjusted or your audio will be blown out and not sound good.
As I mentioned above I used the Rode VideoMicro Ultracompact Camera-Mount Shotgun Microphone which goes for a very reasonable $59 US @ BHPhoto and Amazon. It’s small, light weight, and very compact. The audio quality produced is way better than the on camera microphone and the furry cover all but eliminate wind noise from being an issue. I highly recommend this unit for those just getting started if you want good audio and don’t want to break the bank.


If you want a better sounding microphone there are a number of options to choose from. Some require battery power while others like the Rode I used are powered from the audio connection cable via the camera. The high quality units sound better of course, but are more money, usually require batteries, are physically larger, and weigh more…
Linked below are several higher quality Rode VideoMic options that you can’t go wrong with. They vary in price escort bayan istanbul and offer more advanced features depending on what your needs might be.
Battery and Power Bank Options
You are definitely going to need some extra Sony NP-BX1 batteries for the Sony RX100 VII when doing any kid of extended recording. I recommend the Sony name brand battery first, because it is high quality and will last for a long time, however it is much more expensive and you can get kits for way less money. You can see some battery kits here on Amazon.
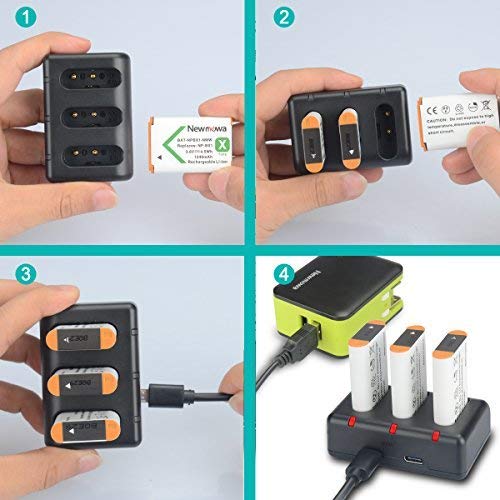
In addition you can also power the camera via the USB port using a USB Battery Bank like these below on BHPhoto | Amazon


This will allow you to power the camera for a really long time without having to worry about the battery dying. This is also great for in the field charging. So even if you don’t use the powerbank to power the camera, having it in your bag to recharge the batteries is an awesome feature. I actually used one of these when I went camping this year at it really worked awesome considering we had no electric. I actually used it to charge my phone, but the concept is the same. Some of these power packs come with a solar panel charger which you can use to recharge the powerpack. The future is here my friends!!
Shooting Grips,Tripods, Selfie Sticks, and Stabilization Solutions
Now once your microphone mounting issues are ironed out you are still going to need something to hold your camera while you are standing, sitting, or walking in front of the camera. So that leads us to tripods, grips, selfie sticks, and stabilizer gimbals.
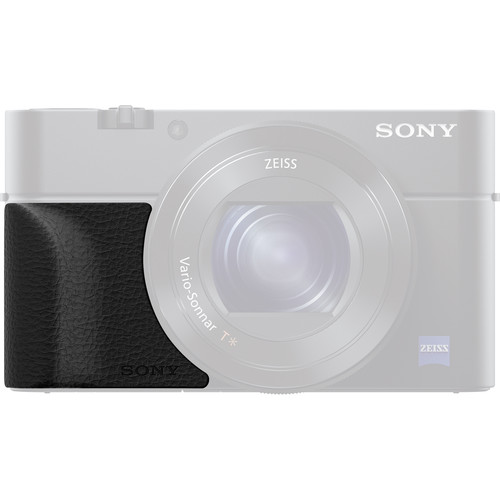
If you just plan on holding the camera itself for filming b-roll footage or taking pictures out and about, then you must consider the Sony AG-R2 Grip which goes for about $15 US @ BHPhoto | Amazon.
This grip really makes the ergonomics of the camera significantly better for those with larger hands and it also makes it much harder to drop. One thing to note about the Sony AG-R2 grip however, is if you plan on mounting the camera into some kind of rig like the ones I mention below, it may not fit.
I showed you above the Sony VCT-SGR1 Shooting Grip which goes for $98 US @ BHPhoto | Amazon It’s a little pricey, but it offers control of the camera cia the zoom lever, shutter button, and record button for video. It’s also ultra compact and turns into a little tripod for tabletop recording and a has a articulating neck which allows it rock down and up for when using on a table or something for example. I found it easy to use and would recommend it. One issue I had with it was the limited articulation of the neck. When on something perfectly level it was great, which is what Sony’s intention was, but if you put on something slightly off level, the camera can not be straightened out left to right. This was a n issue a few times and I had to shove something under one of the legs to make the camera level. This was not the biggest deal, but clearly shows the advantage of a ball head design as opposed to the rocker design.


Joby makes some pretty cool flexible tripods they call gorillapods. They are not only affordable, but extremely versatile making them a great option to consider in my opinion. I reviewed one years ago and ended up purchasing it I was so impressed with it. My Gorillapod Review is Here >>


Gorillapods come in a variety of load bearing capacities, but I would recommend going one model stronger than the capacity limit on the pod. In this case the 1k model with ballhead which supports a max of 2.2 pounds would be perfect in my opinion. The 1k model for about $32 US @ BHPhoto | Amazon
Selfie Stick?
I am not the biggest fan of selfie stick for real cameras personally, because it just seems hacky to me I suppose. They are more designed for ultra lightweight action cameras and cell phones I would say, but at the end of the day the RX100 VII is very light weight and they can be a useful tool depending on what you are doing. I used one when I reviewed the Sony FDR-X3000 action camera last year it for that purpose it worked great! Selfie sticks @ BHPhoto | Amazon
Table top Tripods
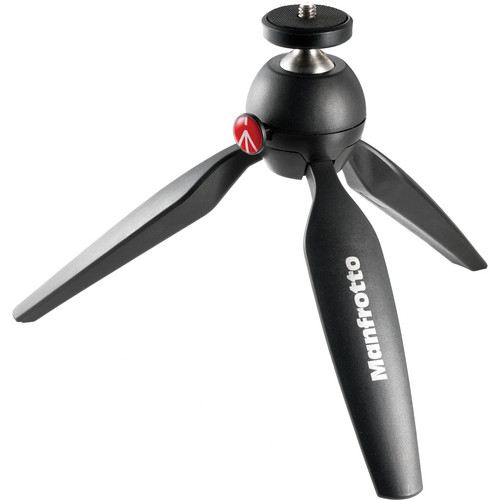
Manfrotto PIXI Mini Table Top Tripod is one of the most popular unit and it’s a very well made product. You can pick one up for about $19 US @ BHPhoto | Amazon


Another option I found which is great for video in particular is the Vanguard VS-82 2-Section Table-Top Tripod with 2-Way Pan Head. It’s very highly reviewed and goes for about $25 US @ BHPhoto | Amazon


Full height tripods
Now if you want to stand in front of the camera and have it on a tripod you are going to need something as tall as you. Therefore you need to take note of the tripods max height when picking one up and make sure it is as tall as you are 😉 These tripods are generally going to be much larger and heavier than the table top units above due to the height requirements, but there are still some fairly compact and lightweight options out there for sure.


I put together the criteria I think you should consider and came up with a good selection to get you going. These are by no means the opny options, but certainly a good place to start. Recommend Tripods for the RX100 VII @ BHPhoto >>
Amazon also has lightweight tripods, but it’s harder to put a group of good ones together like at BHphoto.
Gimbals
Stabilizer gimbals are used to hold the camera steady while moving the camera around and walking for example. They really are amazing technology and they used to cost an insane amount of money, but in recent years they have come down significantly in price. I would highly consider investing in a gimbal if you want to bring your moving footage to the next level in your vlogging ventures 😉


Gimbals come if different load capacities and quality’s. One of the best value for the dollar units I have found so far is the Zhiyun-Tech CRANE-M2 3-Axis Handheld Gimbal Stabilizer which supports up to 1.58 lb and goes for $270 US @ BHPhoto | Amazon
Memory Card Options
As far as memory cards go, you are going to need a SDXC card capable of recording 4k video @ 100mb/s minimum. The larger and faster the card the more recording time you will get and the faster the camera buffer will clear.


Also, when copying the files onto your computer, the faster cards will speed up that process as well which is worth noting depending on how much time you have to get the data on your computer. Here are a few I recommend @ BHPhoto | Amazon
Camera Settings and other Vlogging Tips
Ok, so now you got your camera rig set-up all sorted out, and as I mentioned above in the recommended microphones section, your audio record levels have be dialed in. Now you need to start filming for your first vlog.
If you are totally new to the camera, I recommend watching my tutorial videos starting with this one:

Basic recommended settings rundown:
- 4k Quality
- 24p @ 100MB/s
- Ideal Shutter speed 1/50sec for 24p
- Aperture @ f/2.8
- ISO set to Auto so the camera exposure will automatically adjust based on varying lighting conditions. If you have a constant lighting set-up, then try and set your ISO to solid value, the lower the better.
- Movie Mode on Mode Dial
- Set the White Balance to current lighting conditions so it does not fluctuate while filming
- Autofocus area set to wide mode
- Before and during recording make sure you did not touch the lcd screen by mistake inadvertently enabling touch to focus on a small area of the screen! Unless of course you want to select a specific area using that feature. It’s easy to do this by mistake! RX100 VII – Auto Focus Tutorial This Way >>
For total beginners what I recommend doing first is setting the camera in Movie mode and within movie mode using the P mode which stands for Program Auto. The camera will then make all the necessary settings for you, so basically you just need to hit the record button and talk to the camera.
For more advanced users, while in movie mode I would recommend using shutter priority mode and setting the shutter to 1/50sec or better yet changing to manual mode. Way more info on the Sony RX100 VII Camera Modes in this Tutorial Here >> Once in manual mode I would set the shutter speed to 1/50sec, the aperture to f/2.8 in ideal lighting situations, and the ISO to Auto. Now, if the lighting is to bright outside for f/2.8 and 1/50sec you will need to use a ND FIlter to help slow the shutter down. If you do not have a ND filter to slow your shutter down in bright lighting conditions, then either raise the aperture to a higher value and/or raise the shutter speed to a faster value. When in doubt just use Auto Mode if you are not sure what to do…
ND FIlter:
The Sony RX100 VII does not have a filter thread on the end of the lens, so you will need an adapter kit. I recommend this Mag Filter kit which goes for about $30 US at Amazon (Click Here) You will then be able to attach 52mm filters to the Sony RX100 VII easily.
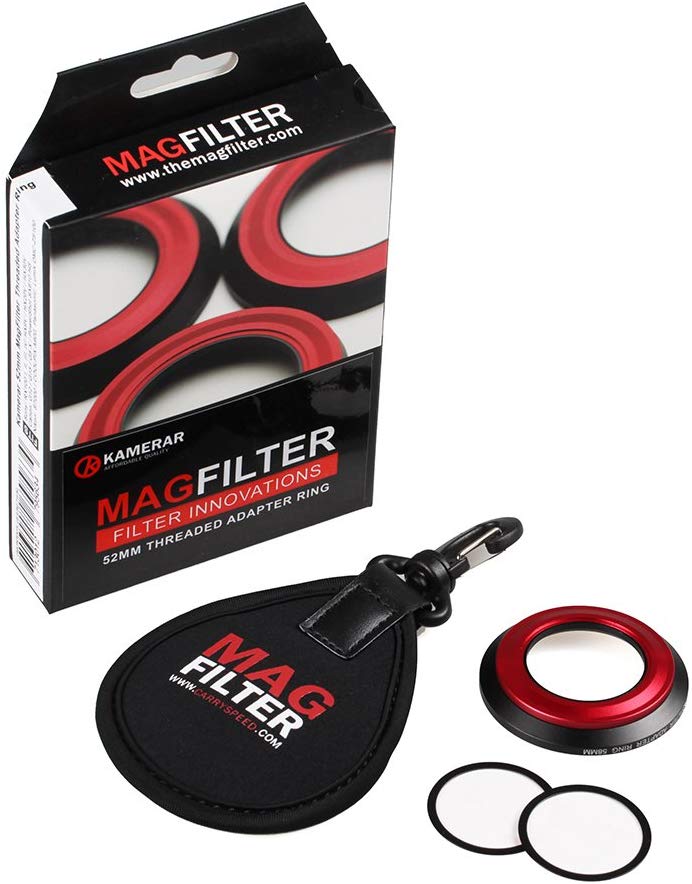
Now, once you get the filter thread adapter on I recommend a variable ND filter so you can dial in the darkness for a variety of lighting conditions. The ND Filter is basically like putting sunglasses on your camera, so you can maintain that wide open f/2.8 aperture and relatively slow 1/50sec shutter speed.
If you are just starting out, I would recommend this 52mm Gobe NDX Variable ND filter which goes for about $34 US @ Amazon. It’s very affordable and good quality. Now you can certainly spend more and get a higher quality filter, but this will do the job for you at a fair price in my opinion.
ND FIlter Solutions for the RX100 VII Here on Amazon >>
Filming tips – B Roll
Take lots of B Roll. B Roll footage as it’s called, is extra filming that is not of you talking in front of the camera. This could be close-ups of something you are talking about, or just alternative angles to something you are viewing for example. You don’t always need to be in front of the camera. You can be talking and filming something else at the same time. The more B roll the better, because in post processing you can drop in various B roll clips to make your video much more interesting to the viewer. Remember, audience retention and entertainment is ultimately the goal for most vloggers.
Try not to make your viewers sick with fast sudden movements! Usually the slower pans are way more pleasing to the eye when watching footage.
If you are interesting in a tutorial on how to post process video for vlogging, please let me know in the comments section below and perhaps I will create one for those interested.
Closing Remarks
That is about it for this article and I really hope it helped you navigate these murky waters of what you need to know and what to buy when it comes to vlogging with the Sony RX100 VII.
I would love to hear your thoughts on the article and what gear you are using for the RX100 VII as it pertains to vlogging type use, so please let me know below in the comments area.
Also, if you have any questions I am more than will to help, so just ask away in the comment area below.
I’ll catch up with you guys next time and have a great day, Jay


