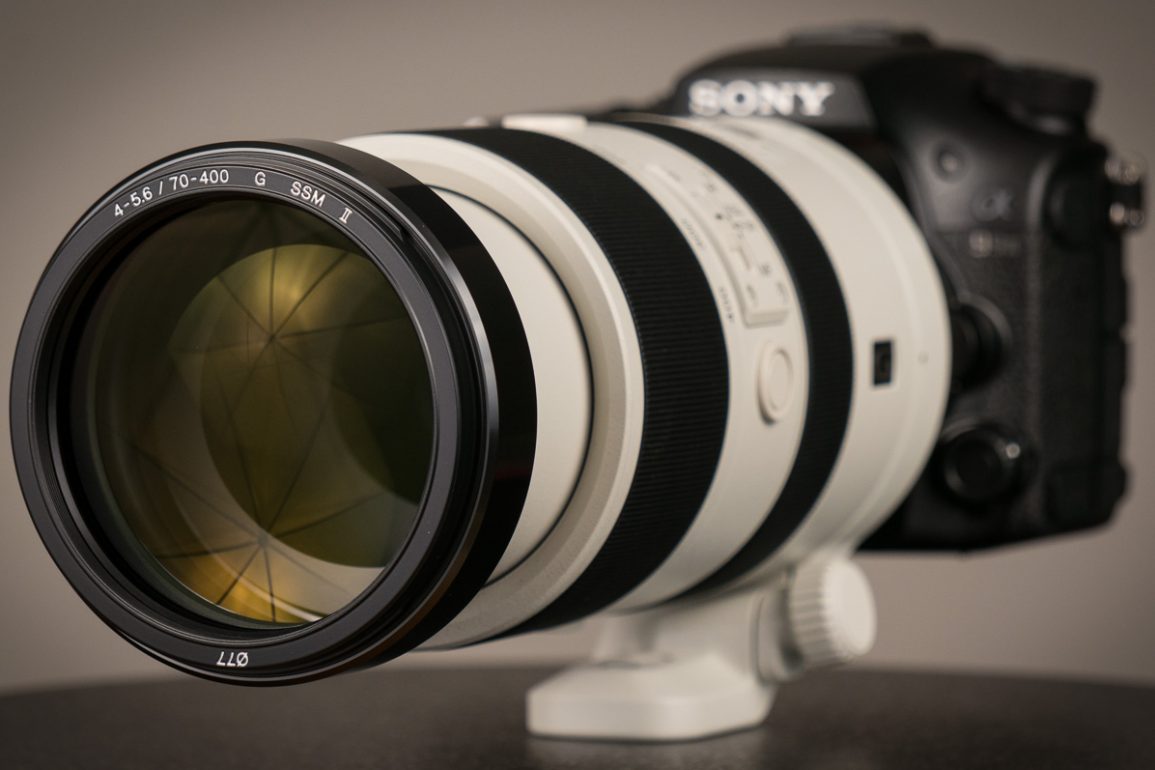
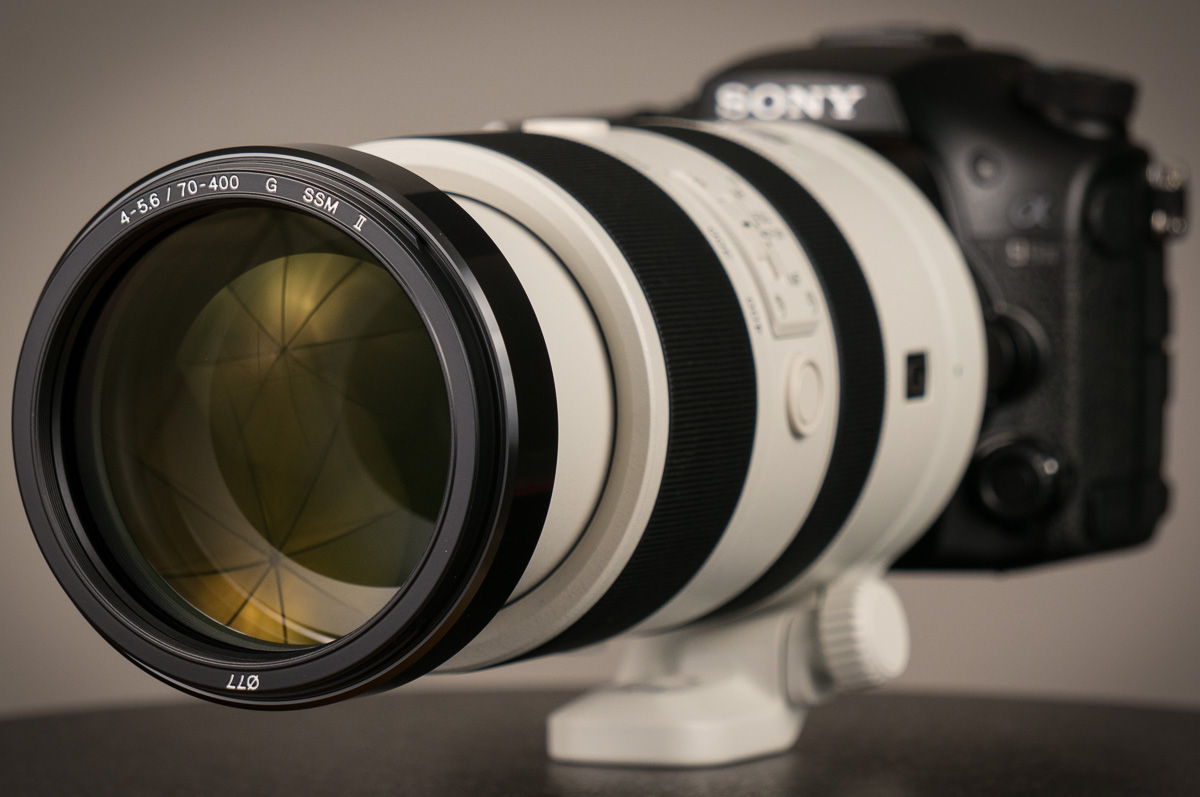
In this quick article I just wanted to show you a aperture run in the Lab courtesy of the Sony A99 II and 70-400mm f/4-5.6 G SSM II Lens @ 400mm. I think it’s cool to see this sort of thing, so hopefully you do as well.
The Sony A99 II is a fierce beast with the 42mp resolution sensor and no low pass filter, so the 70-400mm G SSM II Lens was really pushed to the max resolution and potential sharpness wise in the Lab.
This lens is pretty large for sure, and for this lab testing I had it mounted to my tri-pod using the lens tri-pod mount. This lens is really well balanced on the A99 II and tri-pod set-up that way. I would never recommend using the cameras tri-pod mount when using a lens like this, which is why it has the tri-pod mount in the first place… Some larger lenses don’t have the tri-pod mount however, so I wanted to point this out for those new to this way of mounting.
Lab testing is a lot of fun and when comparing to other lenses and camera sensor sizes, you can really see the difference in the output renderings from the different gear.
The 1″ sensor cameras, like the New RX10 IV I just wrote about Here >> or the RX10 III which I reviewed Here >>, do not offer near the depth of field as the much larger full frame sensors found in the A99 II, A9, A7r II, etc…
The smaller sensor cameras have a huge advantage as far as how small and light weight they can be… For example this 70-400mm f/4-5.6 G SSM II Lens designed for full frame coverage weighs in at 3.3lb / 1,500 grams. In the case of the New RX10 IV, the entire camera with equivalent 24-600mm lens weighs in at 2.41 lb / 1095 g, and is literally palm sized… So you do get something for that smaller sensor, and you certainly get something for the larger format as well.
The APS-C Cameras like the A6500 which I Reviewed Here >>, theoretically offer the best of both worlds. A large depth of field to play with, and also smaller lighter weight cameras and lenses.. Problem is, the lens manufactures never really committed to making all the killer optics for APS-C cameras, and you still need to buy the full frame lenses for the best results.
Sony seams to have decided to skip the 1″ interchangeable lens camera market, and went right for killer all-in-one solutions instead. I think this was a wise choice considering how strong the Micro 4/3 market is. That is just a little larger than the 1″ sensor and smaller than the APS-C sized sensors if you were not aware…
So, that is the tangible reason as to why it’s important to see what the different sensor sizes and optics can do in the lab environment, as well as the real world of course.
So enough of the babbling and lets get on with this quick aperture run style test…
Sony 70-400mm G II SSM Lens – Lab Testing Aperture Run
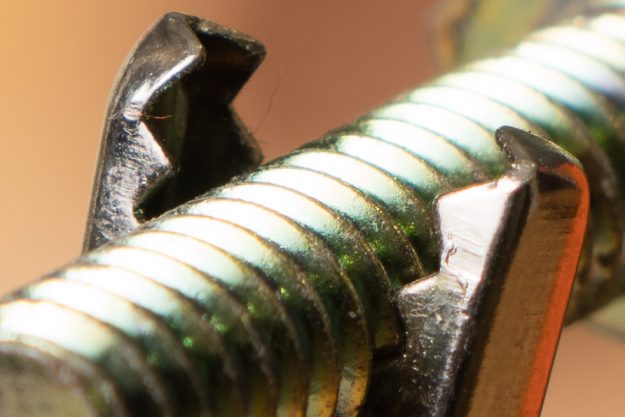
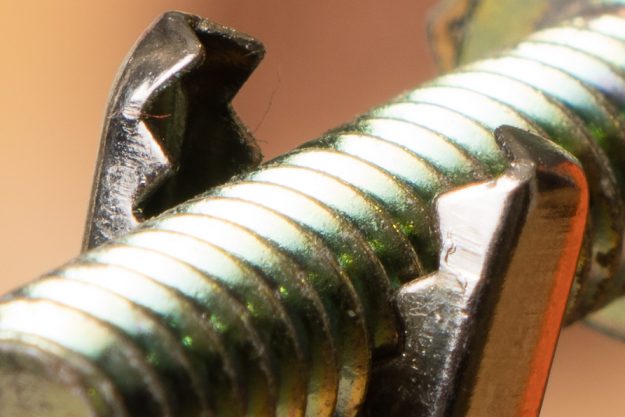
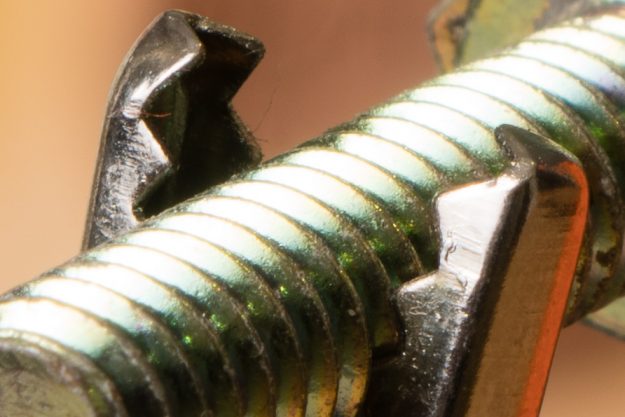
Full Scene @ 400mm minimum focus distance first. All the photo info is in the caption just below the image and I put them in aperture order. I laid out this article so you can just scroll down and watch the depth of field change. So the 100% crops are below the first set of images…
Sony A99 II – 70-400mm G SSM II Lens @ 400mm, f/5.6, ISO 100 
Sony A99 II – 70-400mm G SSM II Lens @ 400mm, f/6.3, ISO 100 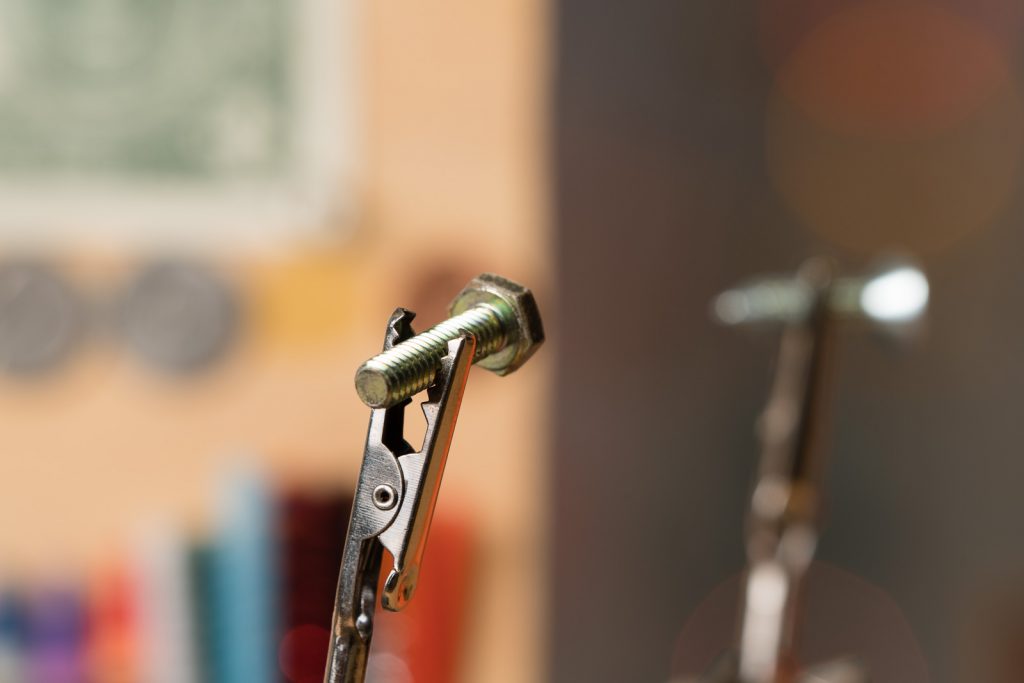
Sony A99 II – 70-400mm G SSM II Lens @ 400mm, f/8, ISO 100 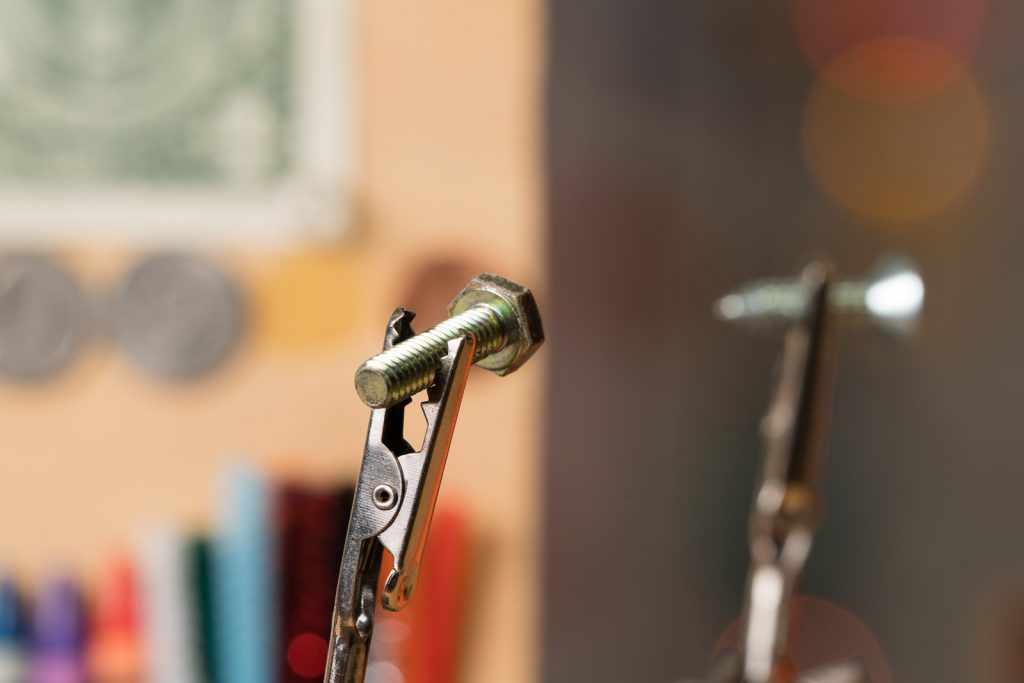
Sony A99 II – 70-400mm G SSM II Lens @ 400mm, f/11, ISO 100 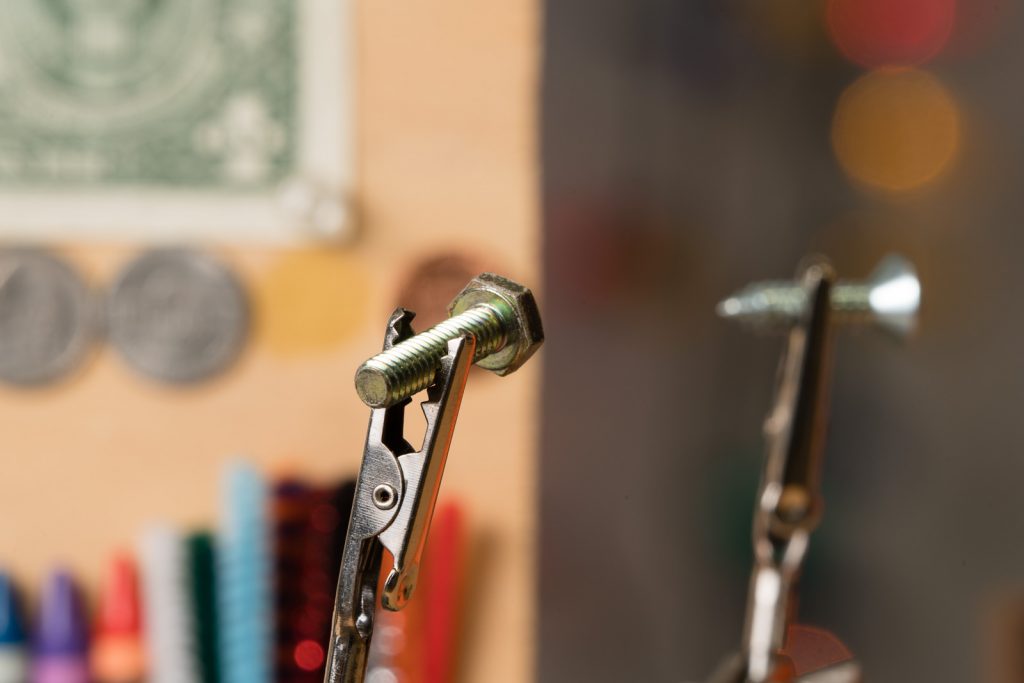
Sony A99 II – 70-400mm G SSM II Lens @ 400mm, f/16, ISO 100
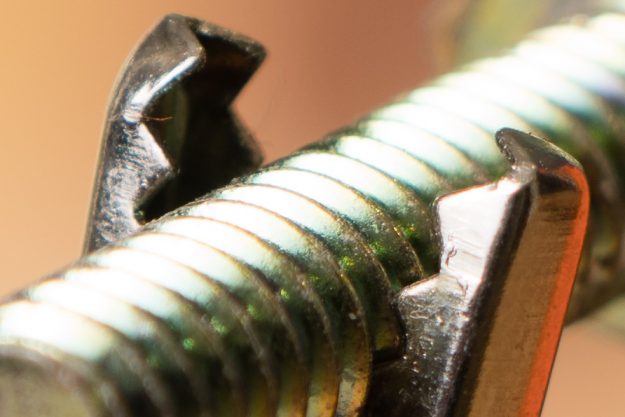
100% Crops


Closing Remarks
So after looking at this Sony A99 II and 70-400mm f/4-5.6 G SSM II Lens aperture run, I’m curious what your thoughts are? The only slightly negative thing I see is the little bit of bokeh ball chopping which is apparent in the f/11 and f/16 frames. It’s really not that big of a deal, but worth noting for those that plan to use this lens at f/11 and beyond. I never really do that with that type of photography with a lens like this, but that does not mean you don’t or won’t…
My Sony A99 II Review is Now Up Here >>
I hope you got something out of this article and please have a wonderful weekend!
Jay
Gear Used in this Article:


