The shutter is the mechanism what controls how long the sensor is exposed to light. It opens and closes like a sliding glass door pretty much, but insanely fast. Basically the time of the exposure is all the shutters job. The longer the shutter is open, the more light that can flow in to fill up that sensor with information. The shutter also controls the effects of motion captured by either your camera moving or by your subjects moving within your scene. Moving subjects can be captured frozen or in motion as a blur depending on the shutter speed that is chosen!
The shutter speed also has standard values for Full Stop Increments just like Aperture and ISO.
1/1000 s 1/500 s 1/250 s 1/125 s 1/60 s 1/30 s 1/15 s 1/8 s 1/4 s 1/2 s 1 full second
On top of these standard full stop values, most cameras have a B setting as well. B stands for bulb as back in the day photographers used an air assisted bulb; kinda like a turkey baster top with a hose. They would simple squeeze the bulb and hold it to keep the shutter open as long as they desired.
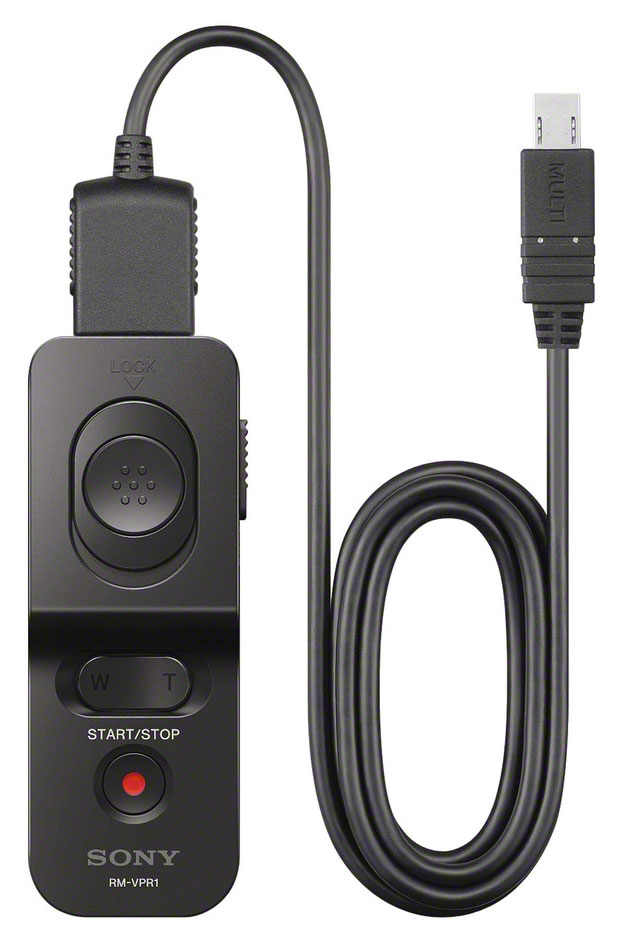
When using long shutter speeds it is important to have as little camera movement as possible. Unless you want that effect of course 😉 A tripod is a must, and a shutter release cable or wireless trigger will help dramatically with camera shake as well. You can also use the self timer feature instead of a remote switch. Two or ten seconds is usually enough for any camera shake to subside and I use this method most often.
When you change your shutter speed the door that allows the light into the camera body is opened for a specific period of Time. The length of time the shutter is left open ultimately depends on you and what effect you are going for. Also, the available light makes a huge difference as the brighter it is, the easier it will be to get a fast shutter speed. Also the faster the lens, the higher the shutter speed you will get in low light situations.
Lens choice also makes a difference. You may have heard the phrase “Fast Lens” or “Fast Glass”. Well that pretty much means high dollar f/2.8 lenses or faster. For example, the Sony FE 85 f/1.4 lens is awesome for low light wedding reception/ portrait type work, because the f/1.4 aperture allows for a ton of light to come in. Therefore making it easier on your sensor to capture the light and yielding a much higher shutter speed than say a f/2.8 lens.
Below are a few Fast lenses you’ll see the Pro’s using:


Using Shutter Priority (S) mode you can make life easy for yourself and dial in the shutter speed you want. The camera will then select the Aperture for you so you don’t have to think at all. Manual mode also would work, but you would need to dial in your exposure perfect by adjusting both the aperture, shutter speed, and possible ISO. In S mode the camera determines the exposure for you and all you have to do is pick the shutter speed you want. You may have to adjust the ISO if your not in auto ISO though 😉
For this image below I set the shutter speed to 1/2000 sec in Tv (S) mode, and the ISO to 800. The camera then chose f/8 for the “correct” exposure.
In this image below the lighting conditions were just perfect!! It was about 4:30pm and My good friend Garren and I were having a blast. The wind was dead calm and I had my tripod, Canon Rebel XTI, and my ultra wide angle Sigma 10-20mm ready to go;) The settings for this image were Av Mode, f/16 @ 6 seconds, ISO 100.
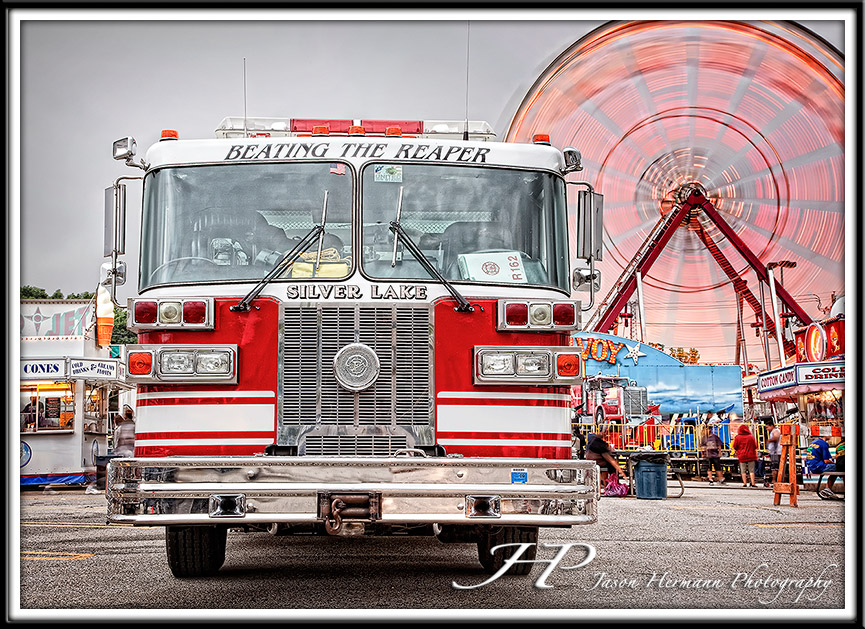
In the next image below I wanted the ferris wheel to look like it was spinning super fast, so I waited for it to get up to speed and then took the shot. My camera was set to f/16 @ 1sec, ISO 100, and I used a tripod of course 😉
Some other terms you should know:
Shutter lag:
Shutter lag is the time between pressing the shutter release and the camera responding by taking the picture. While this delay was insignificant on most film cameras and some digital cameras, it may be a problem when trying to capture subjects which are moving quickly such as in sports or other action photography. This is where point and shoot cameras really lack, and a DSLR is definitely the way to go.
Shutter cycle:
A shutter cycle is the process of the shutter opening, closing, and resetting to where it is ready to open again. The life-expectancy of a mechanical shutter is often expressed as a number of shutter cycles. Basically the more money you spend the more shutter cycles you will get. The Pro camera’s get over 50,000 for the most part.
Sync Speed:
The sync speed is the maximum shutter speed your camera can use, and still effectively capture the light produced by the flash. Pretty much when the shutter curtain travels across the sensor in a shutter cycle, it allows light to travel to the sensor. The faster the curtain travels the thinner the gap between the 1st and 2nd curtain of the shutter. That gap spacing is your shutter speed, and the flash pulse can only get through so thin of a gap. Depending on the camera it can vary, but the max sync speed for most cameras is ~ 1/250sec. When you go over the sync speed you will actually see part of the shutter curtain in your image as a black line that takes up part of the frame.
In the image below I set up my tripod nice and low and my camera was armed with my newly purchased sigma 10-20mm ultra wide angle lens. I really wanted that silky water look, but it was kind bright out, so I stopped down my lens to f/18 and managed to get a full second exposure 🙂
Dragging the shutter
The term “dragging the shutter” refers to when you have your camera’s shutter speed set to less than that of the camera’s sync speed. So your using your flash to illuminate your subject, and “dragging the shutter” to capture the ambient light. This technique is used mostly to help capture the ambient light when using a flash, and some cool effects!
Basically, your camera has a flash sync speed which is ~ 1/250sec. So, if your shooting in a very low lit room and you set your camera to manual mode: f/5.6 @ 1/250sec and take the shot. The result won’t be the greatest, because the shadows are really dark, as the camera sensor didn’t capture any of the ambient light. Now, let’s set the camera to say f/5.6 @ 1/30sec and hold it steady or use a tripod. Your image should look a lot better!! Perhaps even try 1/15th sec, or 1/8th sec to get even more ambient light captured. The shadows should fill in with tons of light information the slower you set your shutter. Be careful though, as your subjects movement can cause some blur as well! 😉
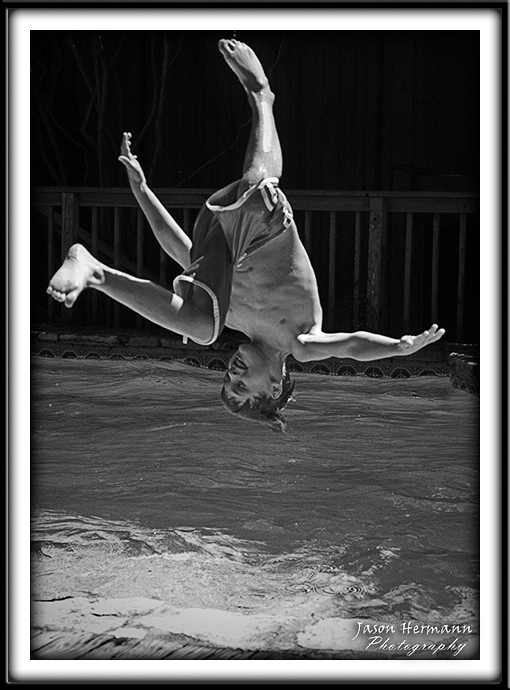
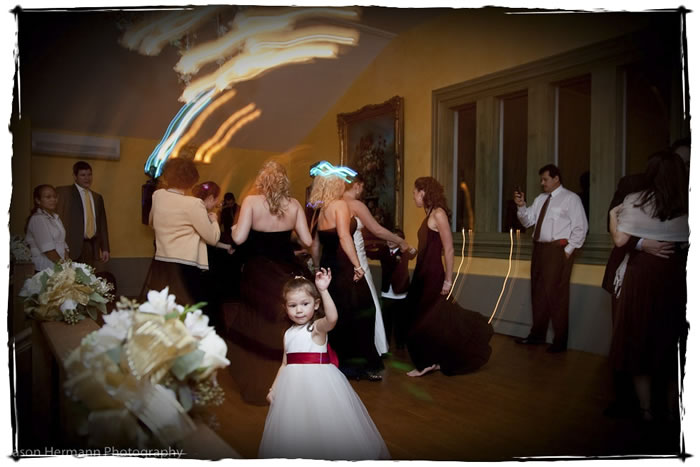
In this image I wanted to try and get that cool twisting effect you see from time to time. So I decided I would “drag the shutter”. I set my shutter to 1/30sec and as I pressed the shutter I quickly twisted my camera on the center axis of the lens. It took me a few tries, but the result that can be achieved is pretty cool! So the flash froze and illuminated the subjects, and the ambient light (the chandelier) blurred in a circle shape.
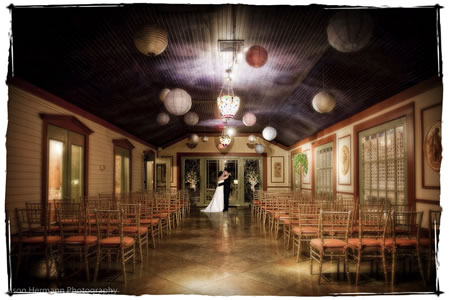
In this wedding portrait below the ambient lighting was very dim, and my camera was telling me a correct exposure was about 1/8th sec @ f/5.6 ISO 400. So I set up my external flash unit and metered it appropriately to illuminate the bride and groom. I then used a tripod and set the camera to f/5.6 @ 1/8th sec and fired away. The flash illuminated the subjects perfectly, and “dragging the shutter” allowed a lot of the ambient light to come in through to the sensor. I then cloned out the flash unit which was to the right of the couple in the photo.
FPS – Frames Per Second:
Frames per second is another important specification of your camera. Basically it is how many times your shutter can open and close per second.
If you’re into sports shooting you would want more frames per second. This is very important to capture that special moment when the baseball is just about to hit the glove or bat for example. the more fps the easier it is to capture stuff like that without worrying about timing it perfectly. Also when photographing children it’s sometimes next to impossible to capture a smile. Well in that case you may want to take advantage of your continuous shooting mode and fire away to raise your chances of a good shot. It’s also very easy to miss the focus on moving targets, so again setting your camera to continuous shooting will greatly increase your chances of capturing the photo your after, and the more fps, the better!! It can however fill up your memory card and camera memory buffer incredible quick!
For reference my pro camera, the Canon 5D Mark II, can shoot 3.9 fps. Really not that impressive and would not be my first choice if I were shooting sports. The Sony A6500 however, has 11 fps, so it would be a much better choice for a sports event 😉
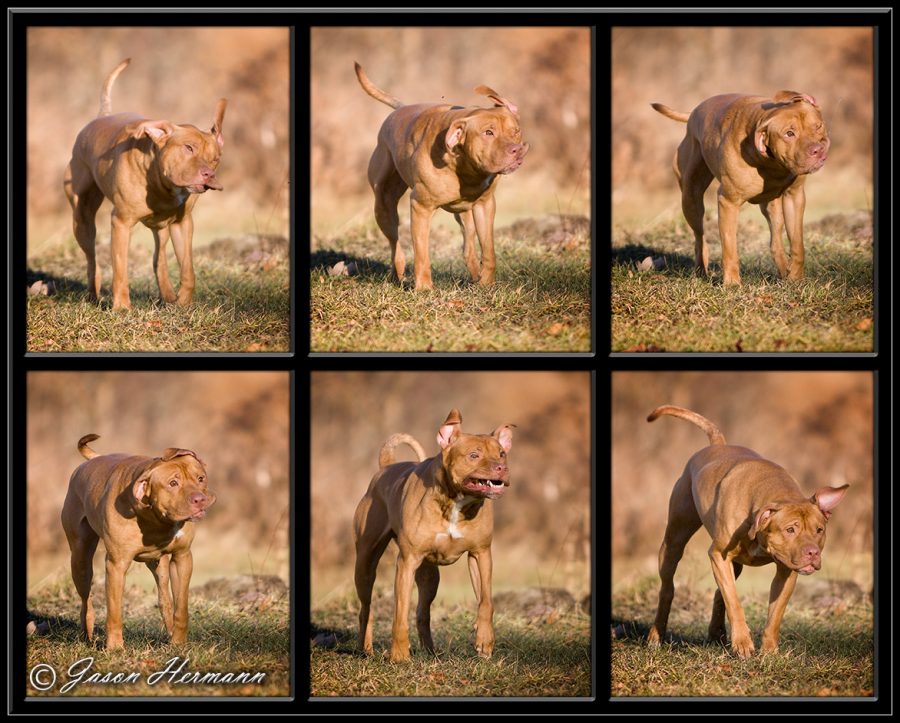
In the image comp below I set the shutter to 1/640sec in Tv mode, and ISO 400. I also had my “drive mode” set to continuous shooting. The camera then chose f/4 for the “correct” exposure. I then simple focused on Chopper and held down the shutter as he did his shake it off dance. I took about 15 shots or so as I was using my Canon 40D, and it can shoot 6.5 fps!!
In the picture of chopper below, he was running towards me at full speed! I knew I would need a super fast shutter and I was shooting wide-open with my Canon 70-200 f/2.8 L IS. So on Av mode with the aperture at f/2.8 and ISO at 200, the shutter speed was 1/1250sec. More than fast enough to capture chopper frozen in time 🙂 As a side not I also used AI Servo mode so the focus would track Chopper as he got closer to me.

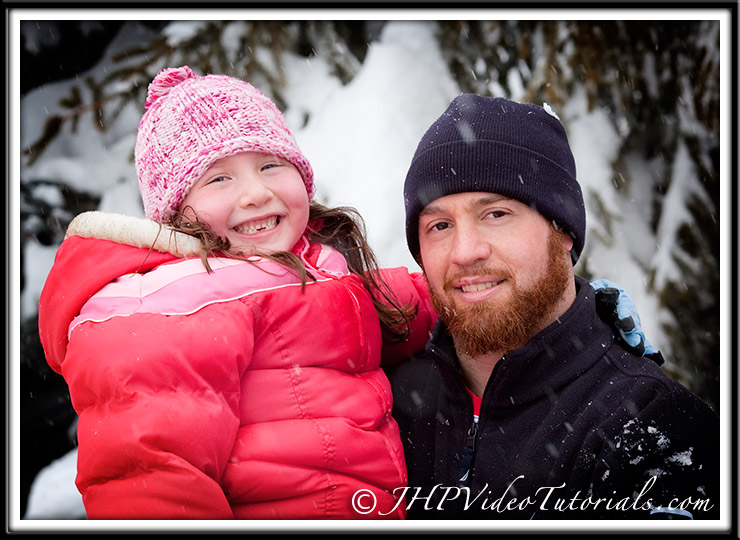
In this next image below I wanted the subjects to be frozen, but I also wanted to capture some motion in the scene with the snow flakes. So I set my camera to Tv mode (shutter priority mode) and then dialed the shutter down to 1/30 sec or so. The camera then chose the aperture for me and I fired away adding a nice sens of motion to the scene 🙂 I used the Canon 135 f/2 L and the 5D mark II for this image.
Getting Creative with Shutter Speeds using Neutral Density Filters
Being creative with shutter speeds is one of the most fun and in my opinion fascinating parts of photography. I love blurry cotton candy water, and I remember a few years ago seeing this awesome photograph on a wall at work. One of those “inspiration sayings” posters you see in cooperate America work environments;) In any event it was a cool s-curve river with really tall layered canyon walls on both side. The water was roaring through the scene almost like the smoke monster in lost. It was incredibly blurry and soft like cotton candy! I was like how the heck did he do that??
Well, chomping at the bit I did some re-search and it turns out they make filters that go in front of the lens which can create all sorts of effects!! What I wanted was a Neutral Density filter to effectively slow the shutter down. Basically what the filter does is put a pair of tinted sun glasses on your lens.
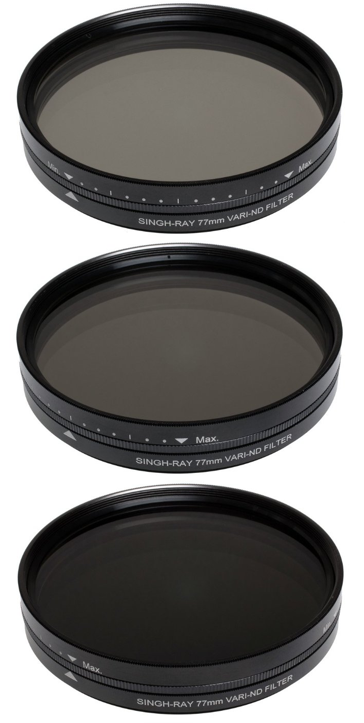
There are all sorts of ND filters available on the market. Circular, Square slot load style like Cokin makes, but what I really like is the Singh-Ray adjustable ND filter pictured to the left. It’s expensive, but totally worth the money if you looking for cotton candy water in the daylight with ease.

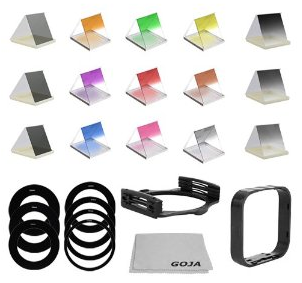
Below is the Cokin solution to camera filters. It is a slot load design which allows for easy stacking of filters. This feature is awesome and I’ve often combined ND filters and ND Grade filters. The ND-Grad filters go from clear to an effect. I have the P-Series and often use the 121M filter for really bright skies.
Below are 2 photos I took from Niagara Falls. The 1st image I took with no filter and my camera was set to f/10 in Av mode. The camera then chose 1/200 sec for the shutter speed. As you can see it froze the water pretty well. I used the Canon 5D Mark II and the Canon 24-105 f/4 L for these Niagara images.
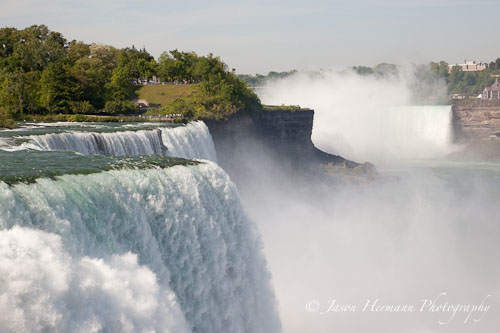
In the second image I put my adjustable Singh-Ray filter on and dialed it down to about 4-stops and changed my aperture to f/16. My new shutter speed was now 1/2 a second and the resulting image is much better in my opinion as it captured the motion of the falls.

In the next image below I used a Cokin p153 ND filter to help get the shutter speed to 15 seconds! The resulting image captures the motion of leaves going around in a circle over and over.

I used the same Cokin p153 ND filter for the next image below as well, and it slowed my shutter all the way down to 10 seconds! The water now almost looks like silk or smoke 🙂

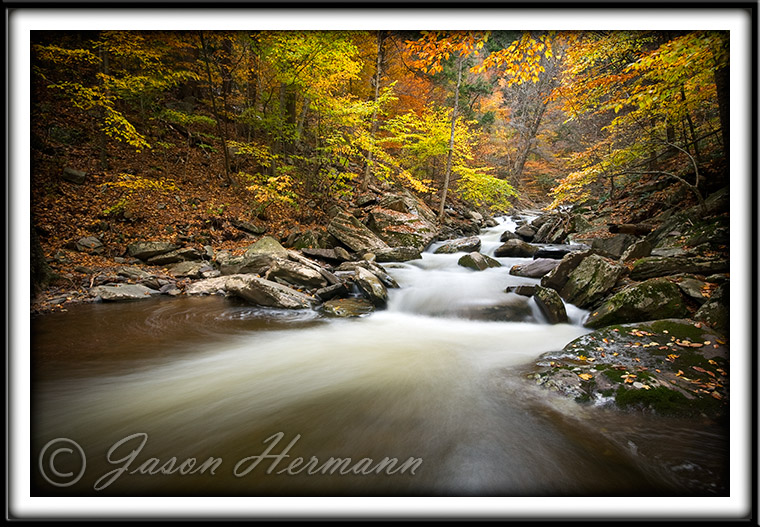
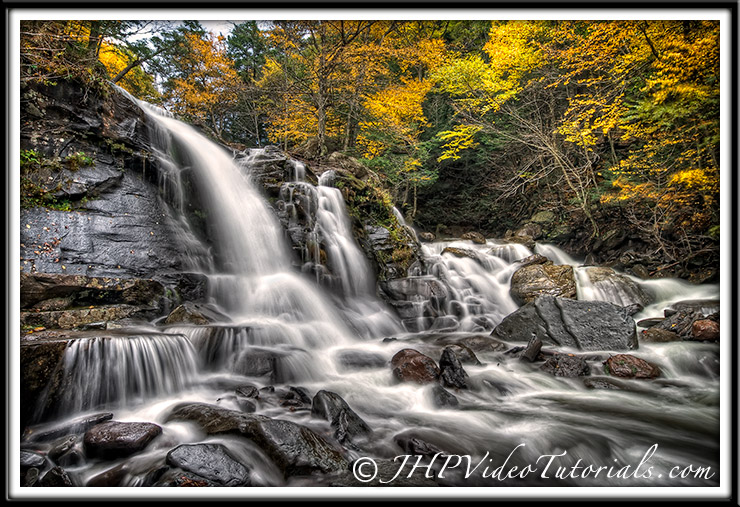
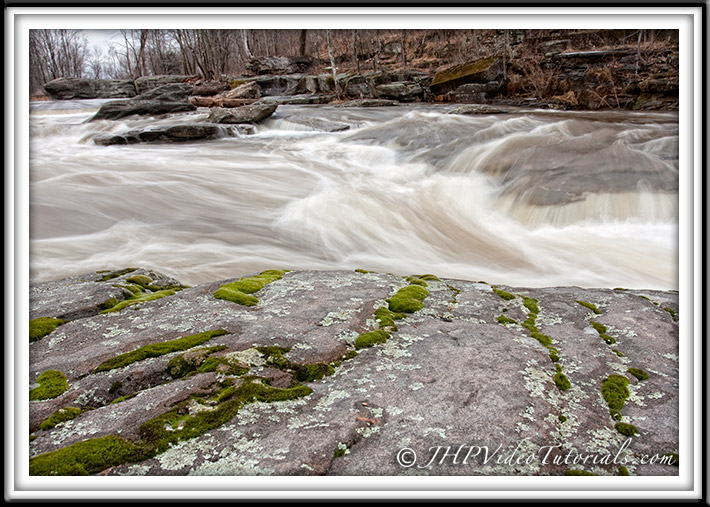
In this next image below it was just before dusk around 4pm or so and I was actually recording the HDR and Silky Water Video Tutorial. I really like this particular composition as the green lines of moss just pull your eye right into that silky water. I really wanted to emphasize the green lines in this comp so I chose and in between aperture of f/11. I focused on the middle of the stone with the moss lines and I new that f/11 would give me a tac sharp foreground with a slightly out of focus background. Just enough to bring the eye back down to the water and mossy lines before it wonders out of the frame. Camera settings were, Canon 40D, Canon 17-40 f/4 L @ 17mm, f/11 @ .7sec, ISO 100, Tri-pod
Panning explained:
Panning is another cool effect in photography and your shutter speed can make or break it;) You need to have the shutter speed slow enough so you can capture the motion of the background as streaks. Also the background needs to be busy in order for the streaks to look the best. If it is a plan concrete wall you won’t notice much of a panning effect.
A good rule of thumb to practice panning would be to have your camera in Shutter Priority Mode (Tv or S), or manual mode, and set your shutter to around 1/60sec. Then try and track your target from left to right, or right to left depending. Practice your technique so your as smooth as possible. Try to imagine that your camera is shooting a laser and your want it on your target the whole time. Just like golf and baseball, the fallow through is very important to keeping your subject sharp. Smooth sweeping motions seem to work best for me.
Once you get your technique down you will need to play with your shutter speed to get the best effect. Focal length, distance to the subject, and distance to the background in relation to the subject all play a role in the panning effect, so a little experimenting will get you the best results 😉
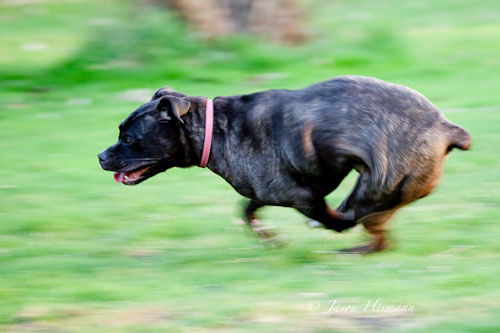
In this image below I was trying to get a cool panning shot for the 1st time and picked an incredibly hard subject. Abby running in circles around me at mach 2!! In any event I got 1 or 2 good shots out of about 50 or so 😉 My camera was set to f/5.6 @ 1/100sec and I was armed with the Canon 40D and the Canon 100-400 L IS @ 160mm. I was shooting in continuous shooting mode and on the Ai Servo drive mode for focusing. I was about 10 feet from Abby and the background was about 10-15 feet or so. She was running so fast even here loose skin and leg movement was captured. Not necessary the greatest shot, but a cool example of what panning and a creative shutter speed can do 😉
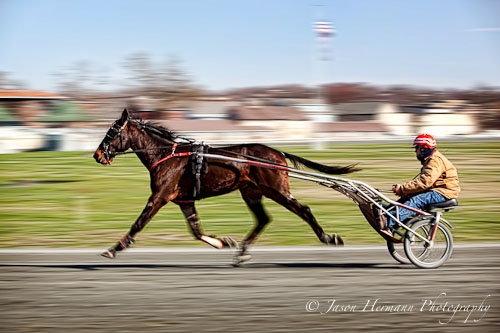
In the horse image below I was armed with my 5D Mark II and the Canon 70-200 f/2.8 L IS. I was determined to get a cool panning shot and was prepared to spend some time if I had to;)I also had the Image Stabilization on my lens set to horizontal panning mode. I first had my shutter set to about 1/30sec, but every shot was blurry, raised it up to 1/160th sec, and the horse was looking good, but the streaks were lacking. It turns out the subject was moving so slow it made it really tuff to get a good streak going in the background. So I set my camera to 1/50sec, f/6.3, 75mm, and the distance to subject was about 50 feet, distance to the background was about 300 feet or so. The horse was only going about 10-15 mph tops. In the end I was pretty happy with my panning efforts.
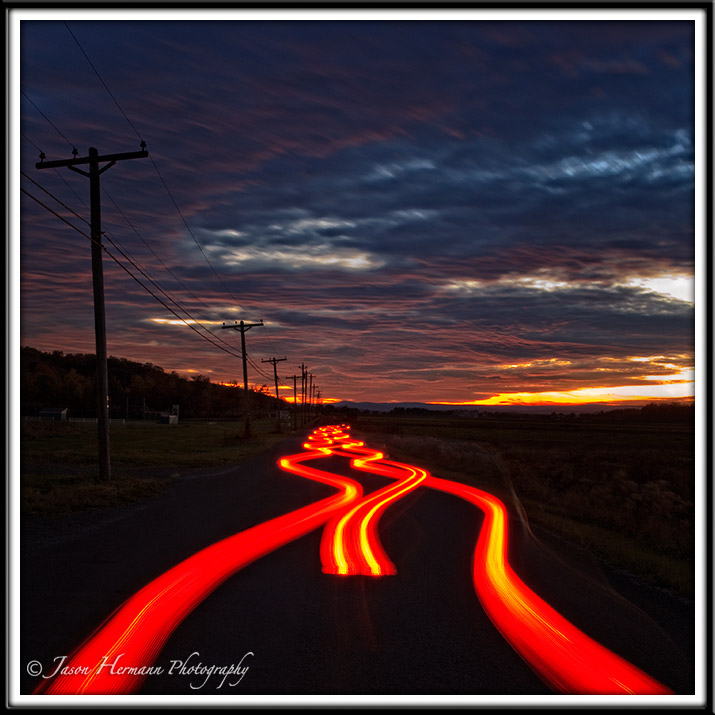
In this next image below, the sky was just incredible and I had this cool idea 🙂 “Hey Michele, can you drive the car left and right as long as nobody is coming and I’ll grab a killer frame” Well, it worked out great and she road the brake as well, which added another light and more streaking red lines. I used the Canon 5D Mark II, Canon 17-40 f/4 L @ 35mm, and I really wanted the longest shutter speed possible with the equipment I had on hand. In this case, the camera, lens and no filters. No big deal though, I stopped it all the way down to f/20, and also set my ISO to 50 which is a nice feature!! That yielded me a shutter speed of 20 Seconds and a really cool exposure.
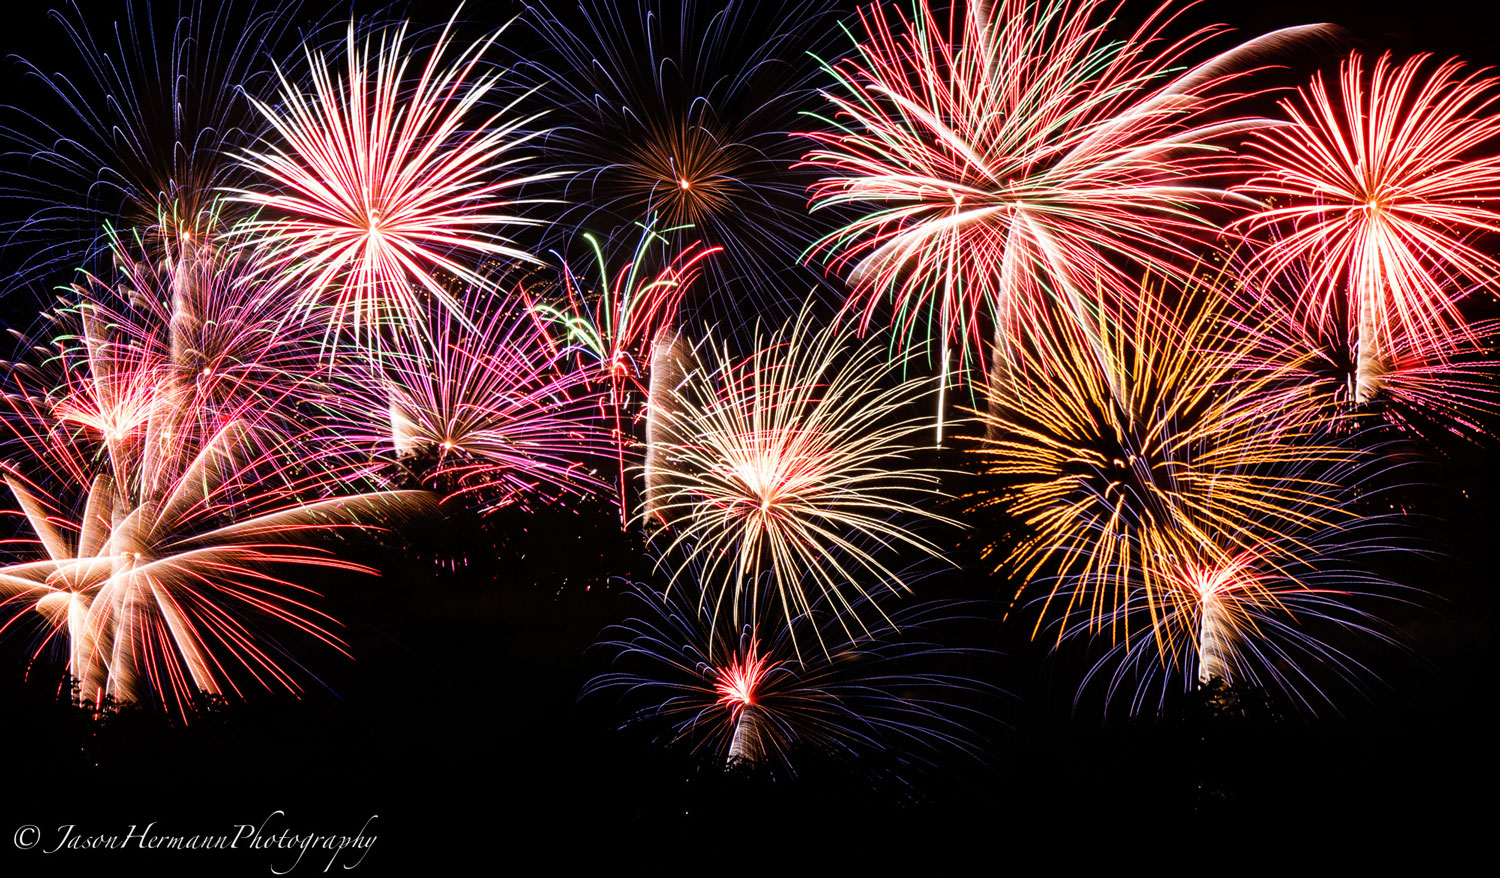
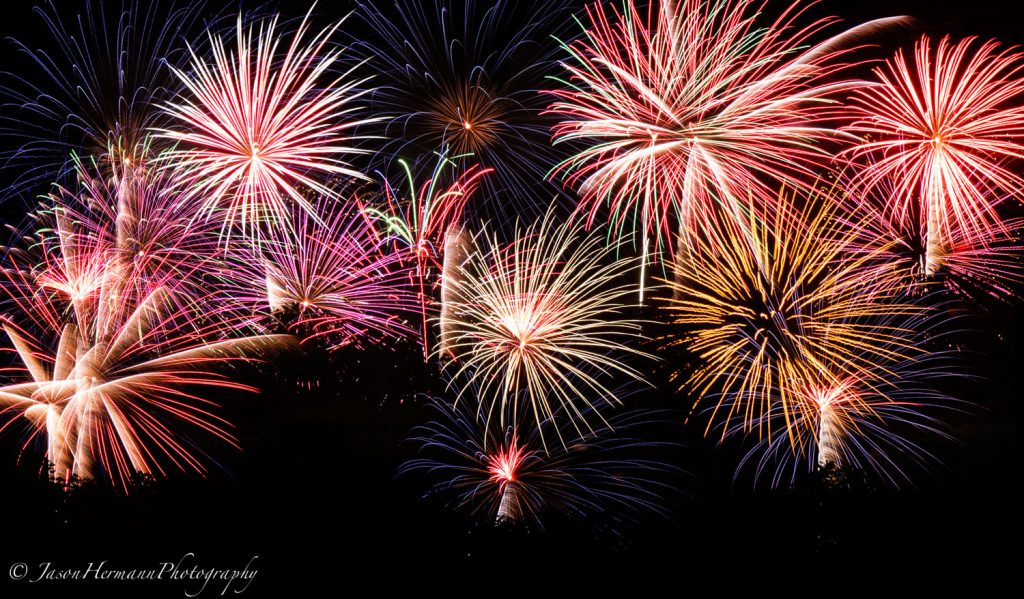
In this fireworks image below I knew I would need the shutter open for a serious amount of time, so I set my camera to manual mode and the aperture to f/8 I then set my shutter speed to Bulb mode which is unlimited time. Basically when using Bulb mode you press the shutter to start the exposure, and then press it again to stop it. So Having my camera set up I simply focused on 1 of the fireworks and fired my shot. I let the camera capture approximately 1 second or so just after the main explosion. I then covered my lens with a piece of cardboard so the camera sensor saw black until I was ready for another. I then waited for the next explosion and removed the cardboard for about a second or 2 and another firework was then painted onto the camera sensor. I repeated this process over and over to get a bunch of firework bursts into one image. Using this method, your basically taking multiple exposure’s on the same frame using Bulb mode and fooling the camera by covering up the lens/ sensor in between blasts. If you just left the camera in Bulb mode without using the cardboard, the scene would be totally blown out from all the over exposed explosions. This is a more advanced technique, but I promise you it works 🙂 Get that tri-pod and a piece of cardboard ready for next 4th of July!!!
Closing Reamrks
Well, that pretty much wraps up my understanding shutter speed tutorial. I really hope you got something out of this tutorial, and if I think of anything else worth adding I most definitely will! Have a great day.
Jay


